
Бесплатный фрагмент - School of Piano Performance
Method of Formation of Pianistic Thought
INTRODUCTION
Before defining the unique characteristics of the proposed methodology, it is necessary to draw your attention to the term of a «pianistic thought». In order to prevent an occurrence of potential misunderstandings due to various interpretations of the term, let’s think and discuss together.
If a musical thought is an ability to operate sound conceptions, then pianistic thought is an ability to simultaneously operate sound conception and motoric senses during the sound inception process. Therefore, when setting a goal to teach a child to operate his auditory and motoric conceptions, a teacher should:
a) Develop his auditory conceptions based on comprehension of the musical language.
b) Develop student’s motoric conceptions, by giving him an opportunity to easily trigger different motoric senses and in such manner to take control over the movements.
c) Create a harmony between auditory and motoric conceptions.
Now we have reached a point, where it is clear how proposed method is different from a traditional one. Here there are no instructions on how to place the hand, there are not many exercises or requirements to play the same musical shapes in a variety of keys, etc. All attention is focused on what the student feels, imagines and how he thinks.
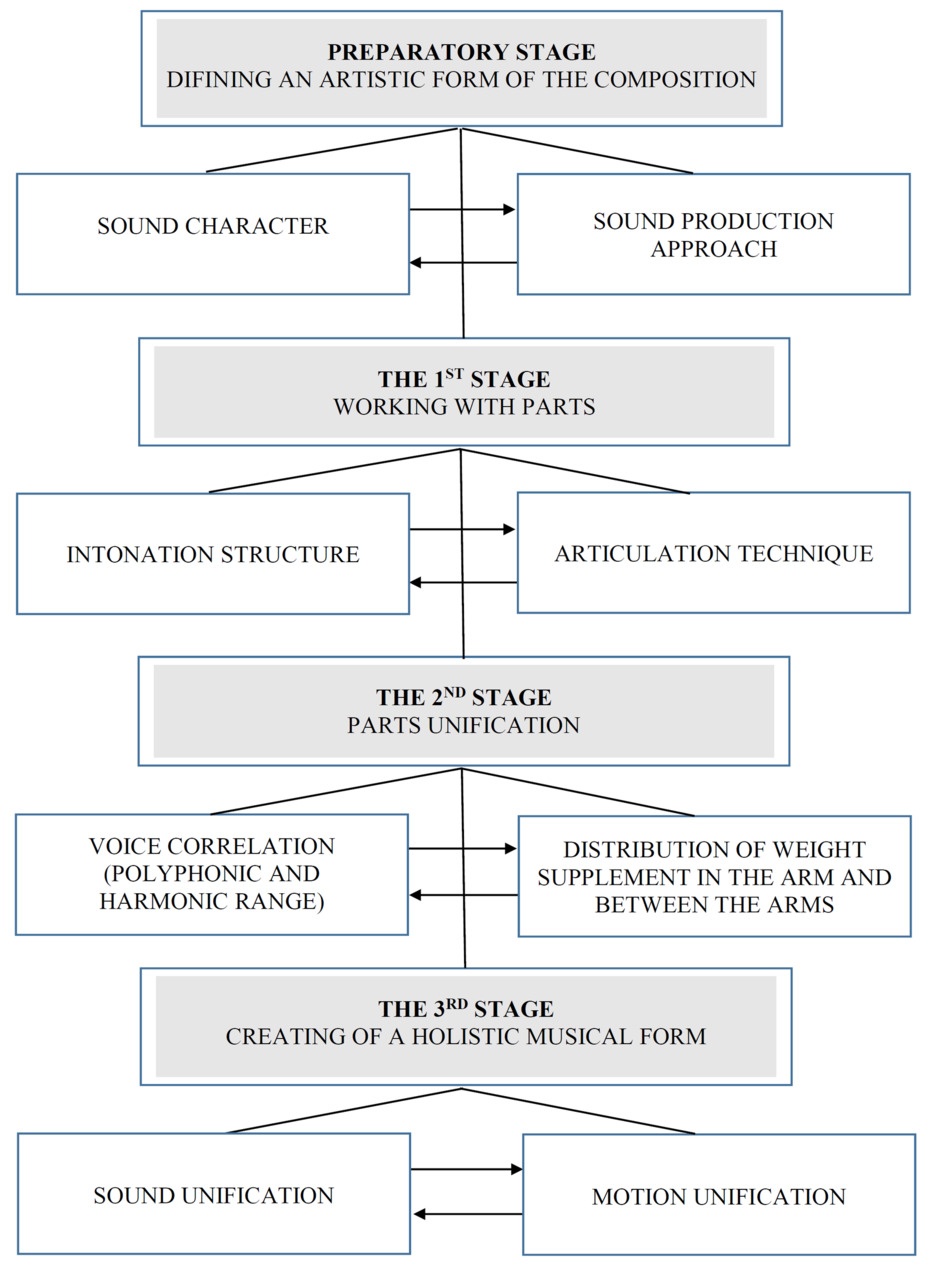
The method is based on the step by step framework for formation of conception in a musical composition (see below) and the principle of enlargement of controlled musical frames, which is used throughout the work process («frame» implies the represented segment of a musical thought).
SCHEME OF IMAGE-REPRESENTATION FORMATION
IN THE WORK AT MUSICAL COMPOSITION
The second fundamental point is the principle of enlargement of controlled musical frames, which allows you to move naturally from controlling each sound to mentally creating a complete form.
THE PRINCIPLE OF ENLARGEMENT OF CONTROLLED FRAMES
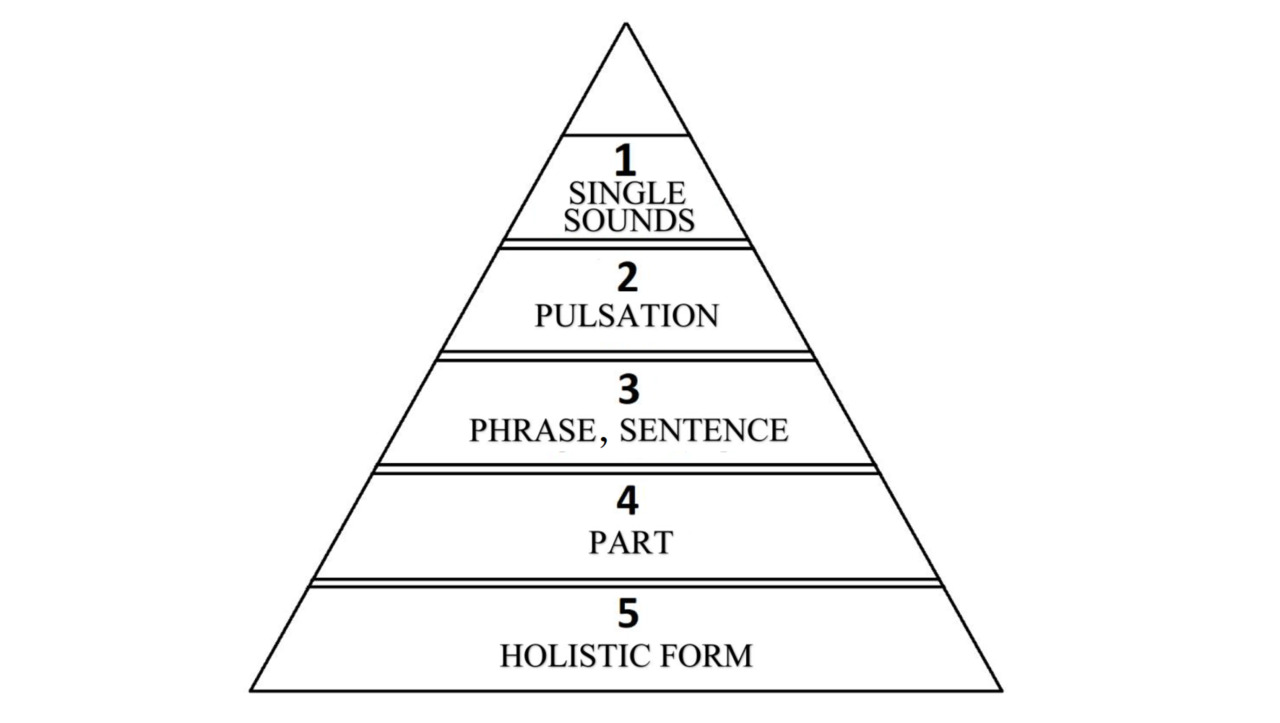
By «control» it means an ability to the simultaneous conception of sound and motoric sensations, including key control, then sound extraction and check of hand’s «resting position». First, each sound is controlled, then only the sounds that fall into the pulse rhythm (the rest are performed subconsciously), then the first sound of the phrase is kept in mind and mentally connected with its last sound. The phrase is constructed in a consistent and holistic way. Same logic applies to units such as a sentence and a part. Finally, the performer controls only the integrity of the sound and the unity of the energy flow from the back muscles, through the hands, palms, fingertips and keys, sending impulses to the strings.
The framework of the musical composition and the principle of enlargement are mastered gradually. As a result of mastering the first topic «Rhythm», the student acquires the ability to create a harmony of auditory and motoric conceptions, when extracting a single sound, and also begins to mentally organize sounds in space and time (this corresponds to the preparatory stage in the diagram and the first two stages of the principle of enlargement). Having learnt the second topic «Intonation», the child is already able to operate with motives and phrases (the first stage of the framework and the third of the principle of enlargement). After completing the third and fourth topics «Polyphony» and «Harmony», the student can «think» and perform in two or more voices, while connecting them in space and time (the second stage of the framework and the fourth of the principle of enlargement). After mastering the fifth, last, topic «Musical form», the child is prepared for an independent practice of a musical composition, moreover he has gained an ability to independently form a holistic conception (the third stage of the framework and the fifth of the principle of enlargement).
Each topic is divided into eight lessons, the eighth one is an assessment check. Each lesson consists of three parts: development of auditory conceptions, development of motoric conceptions, formation of auditory and motoric conceptions. In every lesson, there is an analysis of a new musical composition, but this does not mean that the student should learn and master it in time of one lesson. Musical compositions used in the textbook are not mandatory and can be substituted. Homework is not specified, as it remains at the discretion of the teacher, but daily practice must include: hands and fingers exercises (5—10 minutes), reading from a sheet (one musical piece), work on the musical composition (with the instrument and mental performance).
The course is designed for the initial educational period for children aged 5 and above. It allows to create an individual approach for child’s educational development, where each topic is studied individually until it is fully mastered.
It is better to conduct assessment lesson with a group of children. This way, students, along with the teacher, would take part in an evaluation process of their own performance and the performances of others.
Musical repertoire of the textbook is based on works of early and classical music, which has many ensembles. Auditory analysis is performed on works from «Children’s album» by P. Tchaikovsky.
All educational materials are presented in the form of a direct teacher to student communication. In my professional opinion, such form is the best approach in teaching practice.
PART I
Topic I. RHYTHM
As a result of studying this topic the student should master following aspects:
1. In auditory conceptions:
— determine the rhythmic pulsation (unit of movement) in any kind of musical composition.
— represent the character of given pulsation in accordance to the nature of the musical composition.
— determine the correlation of pulsating beat.
2. In motoric conceptions:
— consciously manage the activity and relaxation of the back muscles, arms, hands, palms, and fingers.
3. In auditory-motoric conceptions (while playing the musical instrument)
— extract the sound according to conceptions.
— think by pulsation.
LESSON 1
1. Development of auditory conceptions
The teacher performs «March of the Wooden Soldiers» by P. Tchaikovsky.
Discuss with the student about the character of the musical composition and determine the unit of movement.
To make the concept of pulsation easier and more natural for the student, teacher may resort to the following analogy: every person has a heart, it beats and you can hear it, its pulse is not always the same, it may change depending on the mood or the state of a person. Same goes with music, any musical composition is a «life» made out of sounds in the space and time, and if you listen carefully, the «heartbeat» of this very «life» can always be heard and felt.
After determining the pulsation, ask the child to clap or stomp through the rhythm, and to conduct the musical work. After, ask him about the nature of the pulsation. How does the heart beat? How does the sound occur (smoothly/quickly, hard/easy)?
Then you need to determine the time signature («two» is slightly lighter than «one»).
After this, you can proceed to an explanation of the sound duration. The simplest and the most natural explanation from the point of temporal sound organization is based on the common unit of motion — a quarter (one step). We’ll count to four:

Now let’s imagine that the bear is stomping, it would step on two counts:

And now, even slower, the elephant is moving:

The hare is jumping:

First, the student should clap according to these rhythmic figures, maintaining the same pulsation and tempo. Then, while counting aloud, student should perform the work on the instrument, it can be done even standing. Such playful approach can be used by the teacher to help the student master this skill. When teacher calls «who is coming» (which animal) or a certain duration, the student should react and reproduce the rhythmic pattern without stopping.
2. Development of motoric conceptions
From the very beginning it is important to explain and show to the student how does the musical instrument create and extract the sound. When playing, we use keys, which are connected to the strings. The energy comes from the back muscles, then it goes through the bottom part of the arms, moving to the palm and then to the fingertips. From fingertips, the energy flows into the keys and the sound appears at the moment when the hammer touches the string. From this moment, the «life» of a sound in the time and space begins. The performer controls the «life» of a sound and can extend or shorten it at own will. To make the sound extraction the way you want and the way it is mentally represented, you need to learn how to control your back, hands, fingers, and keys.
In the first lesson, we will learn to feel the back, hands, palms and fingertips.
Preparatory exercises for the back
Initial position: standing.
On the count of «one» straighten and tighten the back, then try to tighten the muscles under the shoulder blades, on the count of «two» relax the muscles.
Preparatory exercises for the hands
After you have learnt how to feel back muscles let’s see how can we control the hands.
Initial position: standing, hands down.
On the count of «one», involve your back, on the count of «two» raise half-bent arms in front of yourself just a bit above the waist. The feeling should be as if you were inflating air with both hands («air cushion»). Feel the lower part of the entire arm from the back to fingertips. This is the «stream», through which the energy flows, when you are performing on the instrument. On the count of «three», lower and relax the arms, on the count of «four», relax the back muscles.
EXERCISE 1
«Stretching of the palms»
Initial position: standing, back is toned, muscles under the shoulder blades are tightened, half-bent arms are raised in front of you a bit above the waist, elbows are rounded. Feel the lower parts of the arms and hands above the wrist.
On the count of «one», start stretching the palm from the wrist, on the count of «two», it slowly opens, the fingers point upwards, feel the tension from the wrist to the fingertips. On the count of «two-three», the palm closes, the fingers are put down, but the hand remains above the wrist.
When performing this exercise, it is important to make sure that palms do the work. Both arms remain in their original position, while the back muscles are always active.
3. Formation of auditory and motoric conceptions
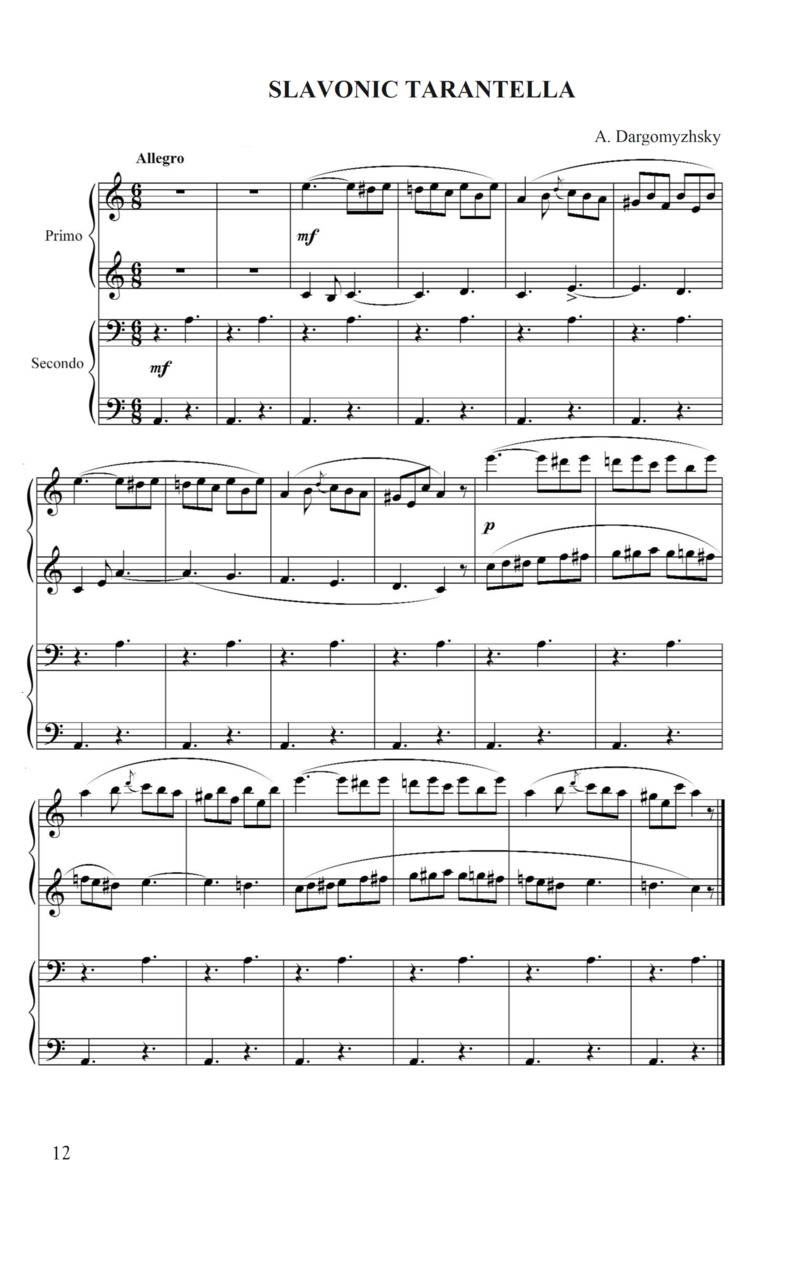
А. Dargomyzhsky «Slavonic Tarantella»
You have already explained to the child how the sound is extracted from the piano. Also, the student has learned to feel his back, hands, and palms. Now you need to encourage the student to practice on the instrument. It is very important that the child finds a comfortable position and repeats what the teacher requires not mechanically, but in a natural manner.
We determine the height of the piano posture: elbows are just a little higher than the keyboard, this position may vary on the level of the black keys. Convenience of the feeling, when transferring energy from the back along the lower side of the hand, through the palm and keys to the strings, is the main criteria. The same standard applies when selecting the distance between the keyboard.
Check the accuracy of your posture by placing both hands on the lid of the instrument.
Exercises on the lid of the instrument
Initial position: sitting at the piano, hands are on your laps. At first, check whether the position of your legs is comfortable, as you lean on them. Also check the activity of back muscles.
On the count of «one», raise your hands from the armpits (do not raise your shoulders up!). On the count of «two», put hands on the lid of the instrument, feel your hands at the lower part on so-called «air cushion». On «three», lean on your palms, feeling the wrists, and imagine how the energy flows into the strings, following to the air and to the space. Then return to the initial position: on the count of «one», raise the hands (from the back), on «two», lower them on your laps, on the count of «three», relax your back.
Exercises with the sound
Make sure to introduce the student to the keyboard (names and sounds of the keys) beforehand.

Initial position: same as in the previous exercise.
Before the start, make sure to check the comfort in the leg position and activity of the back. The child chooses any note and decides in what character he wants it to sound. Then, after «imagining» the sound, he extracts the sound. The fingers are placed freely on the keyboard, the palm is widened and the hands work from the back.
This exercise can be performed with the following count: on «one», «imagine» the sound, on «two», extract the sound, on «three», listen and control the energy flow, on «four», return to the initial position.
After the child has mastered the work with the keyboard, the «Slavonic Tarantella» by A. Dargomyzhsky can be played four hands. You just need to show the student all the keys and together determine the pulsation in this composition. Make sure that the student does not look up from the keyboard, and easily works with his hands from the back.
LESSON 2
1. Development of auditory conceptions
The teacher performs the «Waltz» by P. Tchaikovsky.
Student must find the pulsation (perhaps he could only notice the bar), determine the size and character of the pulsation («one» is bearing, «two» and «three» are lighter).
Next, you can draw the student’s attention to the middle part of the waltz, where the nature of the pulsation changes. For example, point out the differences between waltz and march, etc.
2. Development of motoric conceptions
After repeating the exercises from the previous lesson, learn and practice new ones.
Preparatory exercises for the fingertips
Initial position: standing, back is active, arms are extended in front of you a bit above the waist, feel the lower part of the arm from fingertips to the back. Make sure to check how your palm feels.
Mentally direct the hand towards the wall and draw a circle in the air, your hand moves along the fingertips’ trajectory without breaking the position. You can draw circles in different directions, also can work with other shapes (like eights), you can try to draw the shape with both hands at the same time.
EXERCISE 2
«Big circles»
This exercise develops a sense of integrity in the hand from fingertips to the back.
Initial position: standing, arms are bent and touching the body at chest level, hands are lowered.
Hands follow the fingertips, when drawing circles in a surface, parallel to the body. Hands go up, palms are stretched and are turning towards each other with the back side. Further, hands go down through the sides and return to the initial position. Count on «four». It is necessary to feel fingertips, tension of the palms, the hands on the lower side and the activity of the back.
3. Formation of auditory and motoric conceptions
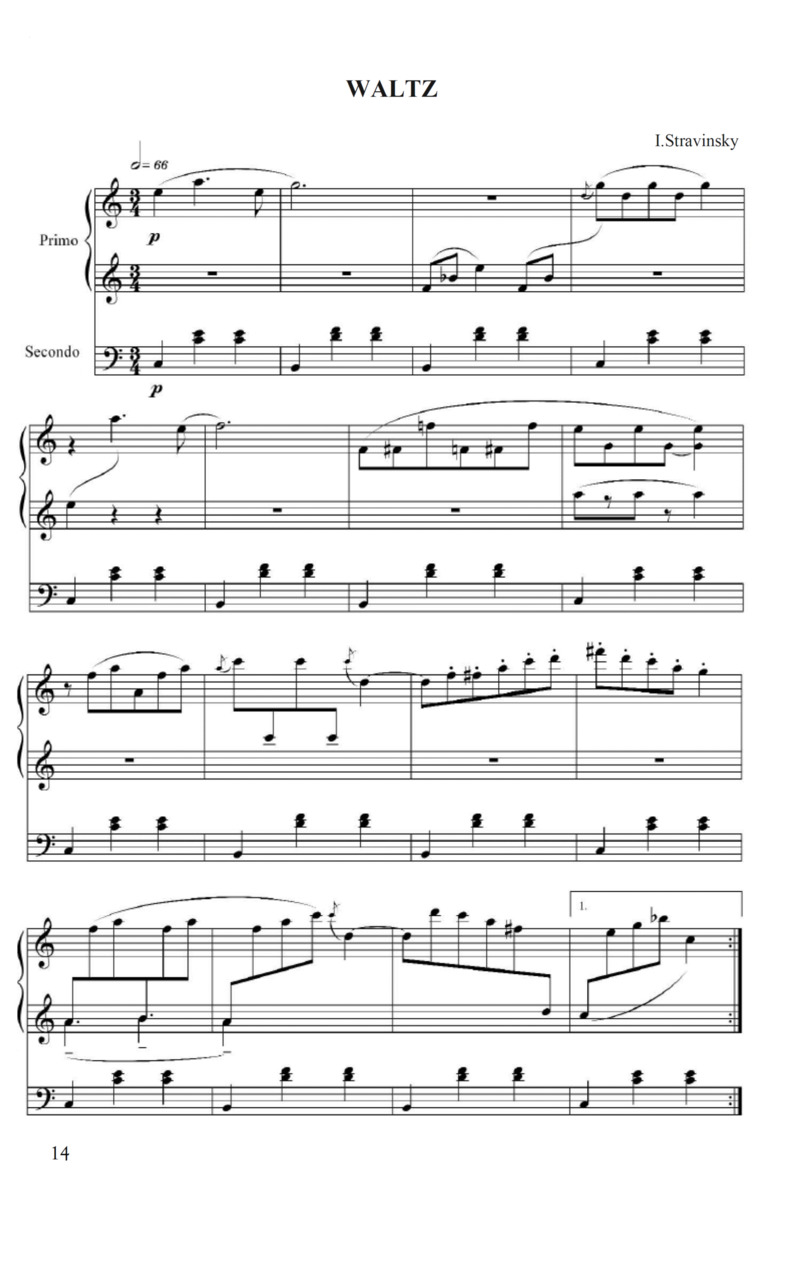
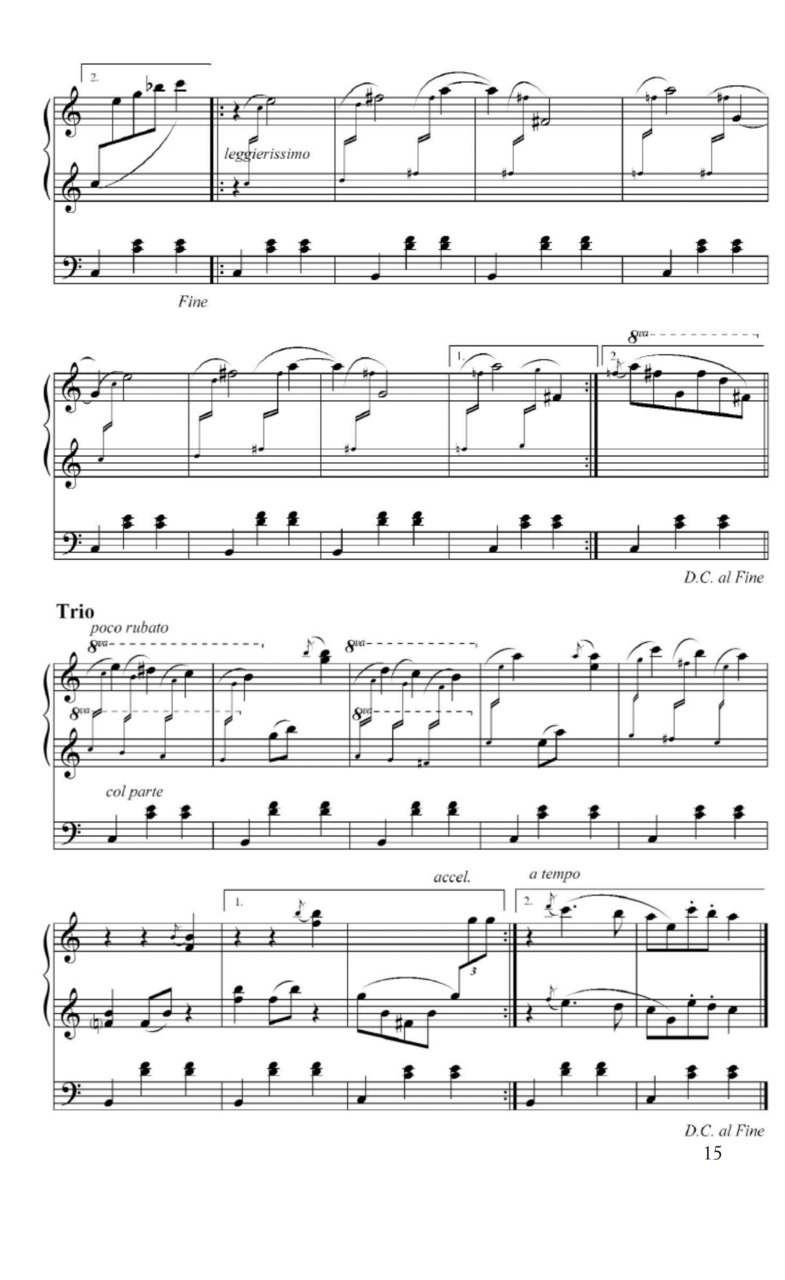
I.Stravinsky «Waltz C major», Three Easy Pieces
Find all necessary sounds on the keyboard. The bass voice is played with the left hand (second and third fingers), while the right hand, from the very beginning should be kept on the entire position (from the second to the fifth fingers). Touch the keys with your fingertips, keep fingers in an almost straight position, properly feel the palm.
For coordination of movements, it is better to start from clapping the rhythm/figure on the lid of the piano. During such exercise, make sure to slightly lift the left hand a bit above the lid and to keep the right hand inseparable from the surface (both hands are working with a support from the back). Before extracting the sound, the student should feel the keys with his fingertips, then «imagine» the sound and timely hit the string with the piano hammer (count out loud).
Musical notation, with three reference points (key «so» — note «G», key «fa» — note «F» and the central note «C»), also can be explained after the waltz performance, let the student find out how the sounds are recorded by himself.

LESSON 3
1. Development of auditory conceptions
The teacher performs «Polka» by P. Tchaikovsky
The student determines the character and unit of movement (can jump with the music). Further find out how polka is different from march, and especially from waltz. It is crucial for the student to feel the difference between quarters and eights through hearing, and also, he should be able to conduct by eights and quarters.
2. Development of motoric conceptions
In lesson 3 we learn how to manage the work of fingers without the support from the hand.
EXERCISE 3
«Birds»
Initial position: standing, the back is active, arms are in front of you and hands are a bit above the wrists.
On the count of «and», slightly tighten the palm and raise your fingers up, further, on every count «‒one, two, three, four–» swing straight fingers down. Your back, arms and hands remain in their initial position.
3. Formation of auditory and motoric conceptions
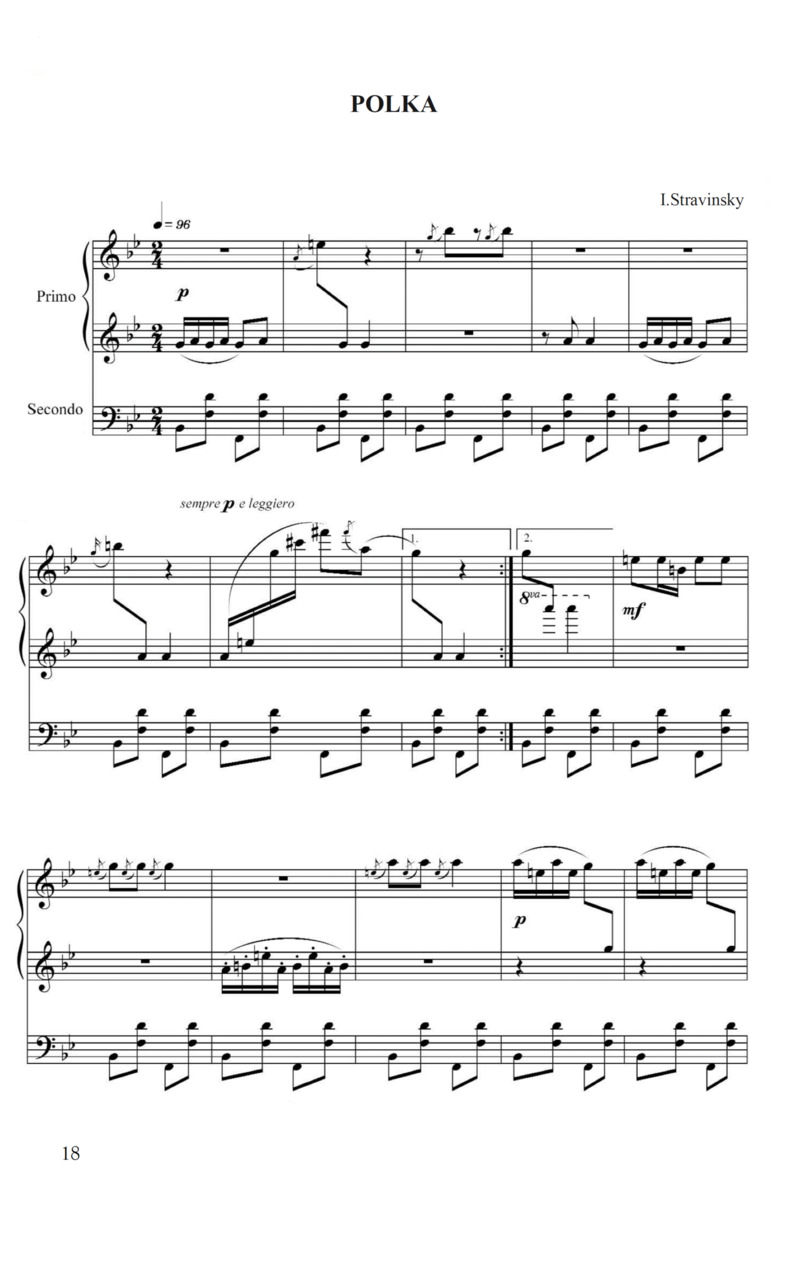
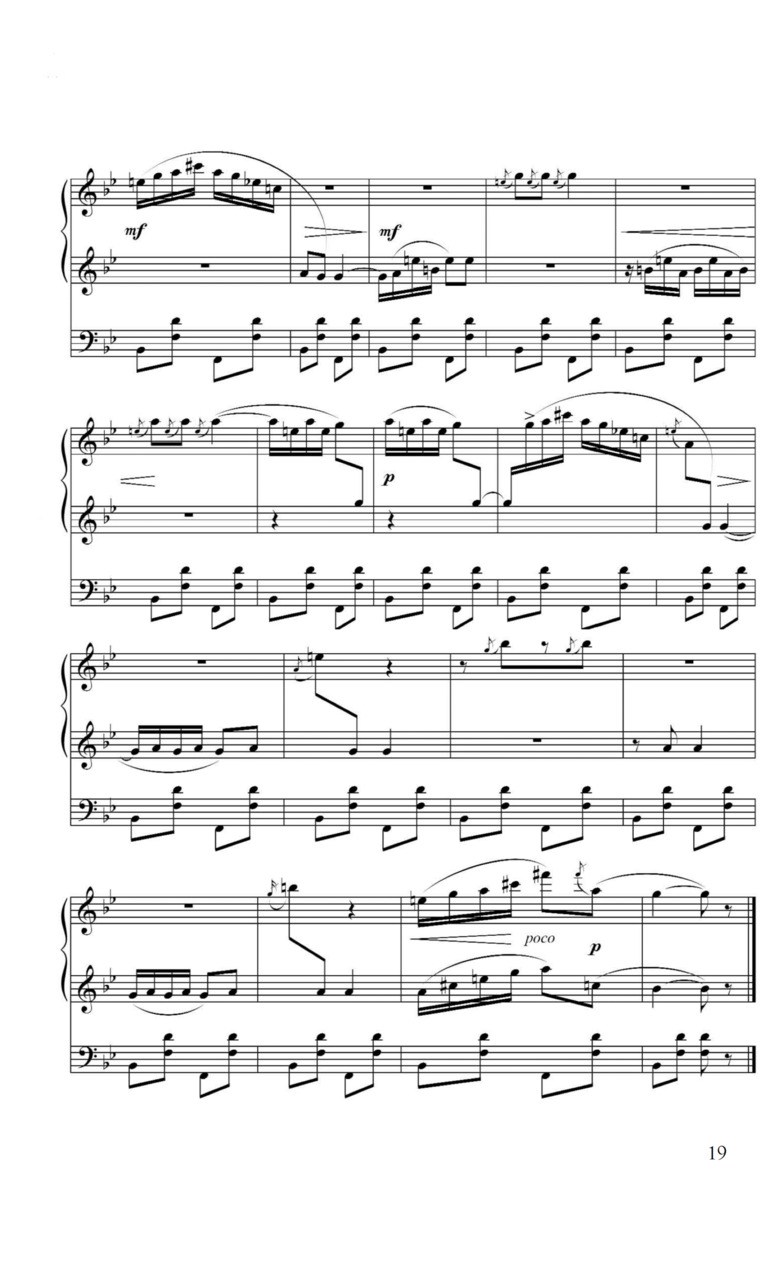
I.Stravinsky «Polka», Three Easy Pieces
First, teach the child to find a «flat» and «sharp». Make sure to explain that the «semitone» is the shortest distance on the keyboard and teach how to raise and lower the sounds. The student should try to «imagine» how the semitone would sound in the «up» and «down» trajectory. After the student has mentally «heard» the sound, he should perform it.
Work with polka in the same way you practiced the waltz: first, the teacher plays through, then find the student’s part on the keyboard (by each note). Second and fifth fingers of the left hand and first and fifth of the right hand must always be kept on their keys. First, feel the key, then, slightly «push it away» with the entire left hand. Left hand, once again, should be raised higher than the right one. The most important thing is to control the moment of the sound extraction, as well as the accuracy of the hammer hitting the string. It is better to practice by sentences, giving the student an opportunity to orient oneself in a musical composition.
LESSON 4
1. Development of auditory conceptions
The teacher performs «Kamarinskaya» by P. Tchaikovsky.
The student conducts, determining the pulsation, unit of movement and sound character. He can even dance (adding the sit-ups). Such move would allow the student to naturally unify auditory and motoric conceptions
2. Development of motoric conceptions
EXERCISE 4
«Shoulders»
This exercise allows the student to learn how to feel the shoulders. Strained shoulders often obstruct the freedom of energy flow during the piano play.
Initial position: standing, the back is active, shoulders are calm, hands are relaxed.
Perform the exercise as follows: raise and lower your shoulders, move them forward– and then return to the initial position — back — and then again to the initial position, then make a circular movement with the shoulders.
3. Formation of auditory and motoric conceptions
P.Berlin «THE MARCHING PIGLETS»
Here we learn about different slurs. It is important that the student would learn how to control the difference of sounds in accordance to various motoric sensations.
Legato slur — sounds are connected, one smoothly turns into the next one. Fingers do the work. The hand is calm; it provides energy transfer to the strings. We will play on five keys in the row (both white and black keys). Before the start, all fingers are placed on the position. On the count of «and», «imagine» the sound, slightly swing your finger and tighten your palm. On the count of «one», extract the sound with a stroking motion of the fingertip «towards yourself». Make sure that the previous sound is not delayed and assure your hand is in a «resting state» after the sound extraction.
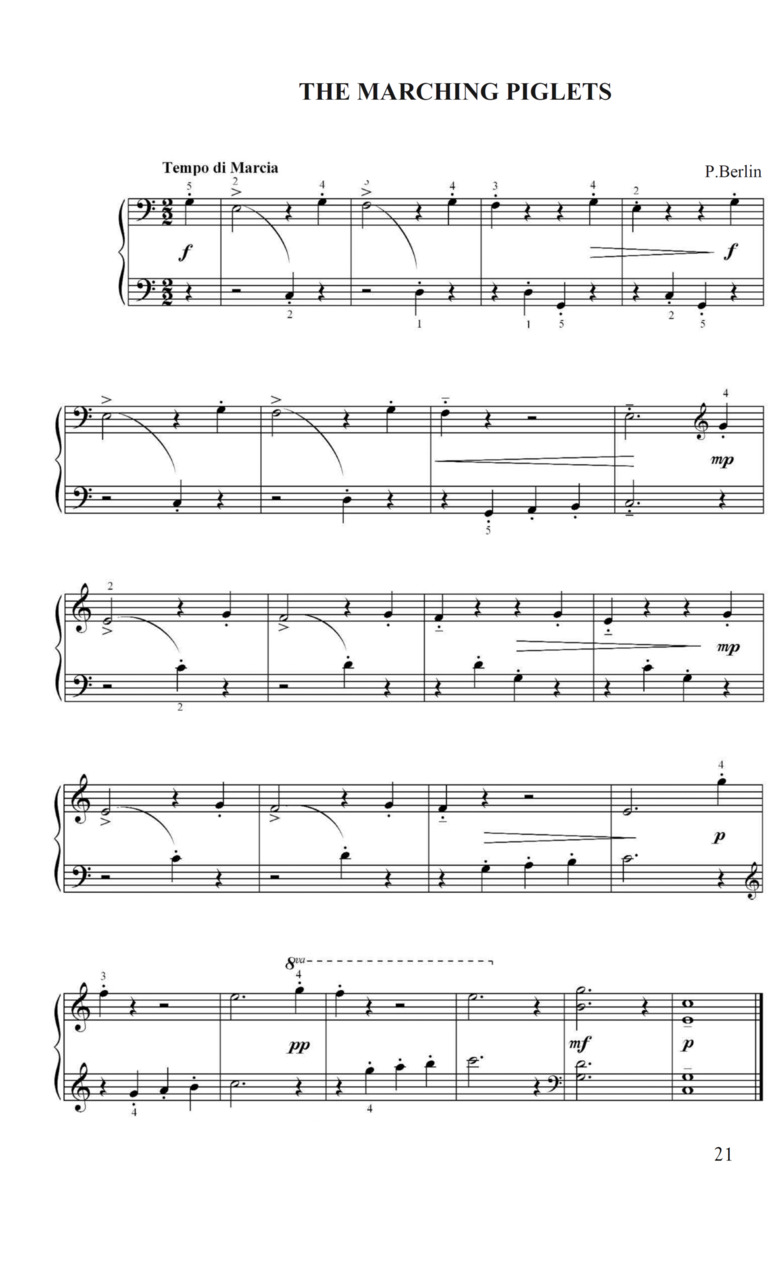
Non legato slur — there is some air between the sounds. Hand works on each sound. Fingertips are slightly «grasping» the key. On the count of «one», slightly push the keys with your hand, sending the hammer to the string. Next, on the count of «and» make sure your hand is in the resting position, check that fingertips are touching the next key and «imagine» the next sound, keep going in the same pace.
Staccato slur — in order to get a sharp and short sound, the fingertip should «grasp» the key, and your hand should work a bit faster, than in non legato slur. Check the release of your hand on the next key. Motoric sensations can be first controlled on the lid of the instrument. Pay attention to the constant activity of the muscles under the shoulder blades, work of hands with a support from the back and compulsory fixation of the «resting position».
Determine the pulsation (by halves), the character of this pulsation is confident, but also is a bit like a clumsy «stomping». Pulsating beats differ — the count of «two» is lighter than «one». According to the nature of the sound, find a proper sound extraction technique: fingertips are quite active, partially use the weight of your hand (muscles support from underneath). Find the right sounds and clap through the rhythm, trying to «imagine» how it would sound. Slowly perform the composition on the piano, while adhering to the slurs. Make sure that before the sound extraction your fingertips feel the keys, with such approach even the last chord can easily be performed.
LESSON 5
1. Development of auditory conceptions
The teacher performs «Mazurka» by P. Tchaikovsky.
While listening to this composition, the student should determine the pulsation (by quarters), difference of the pulsation character in comparison to the waltz (highlight of the third beat), grand activity of the sound attack etc.
Teacher introduces the following rhythmic figure:

First, he explains how sixteenth can be interpreted as four sounds with pulsation on quarters. Ask the student to clap through any of the given rhythm in sixteenths with the count in quarters. Pulsation by eights can be used as an auxiliary practice, but to avoid stretching the count, make sure to pronounce «and» on the count of one sound. In a similar way, learn how to imagine and clap through the triplet.
2. Development of motoric conceptions
EXERCISE 5
«Fingers in a fist»
Learn how to simultaneously control the work of the palm and all fingers.
Initial position: standing, the back is active, arms are in front of you, hands are a bit above the wrists.
On the count of «and», slowly open your palms, on the count of «one», quickly group your fingers into the fist, the thumb should be inside. This exercise can be also performed in other ways:
a) quickly open your palms and slowly «close» fingers into the fist;
b) energetically work with your palms and fingers back and forth. When performing the exercise, you need to send mental commands only to your palms and fingers, while arms remain still.
3. Formation of auditory and motoric conceptions
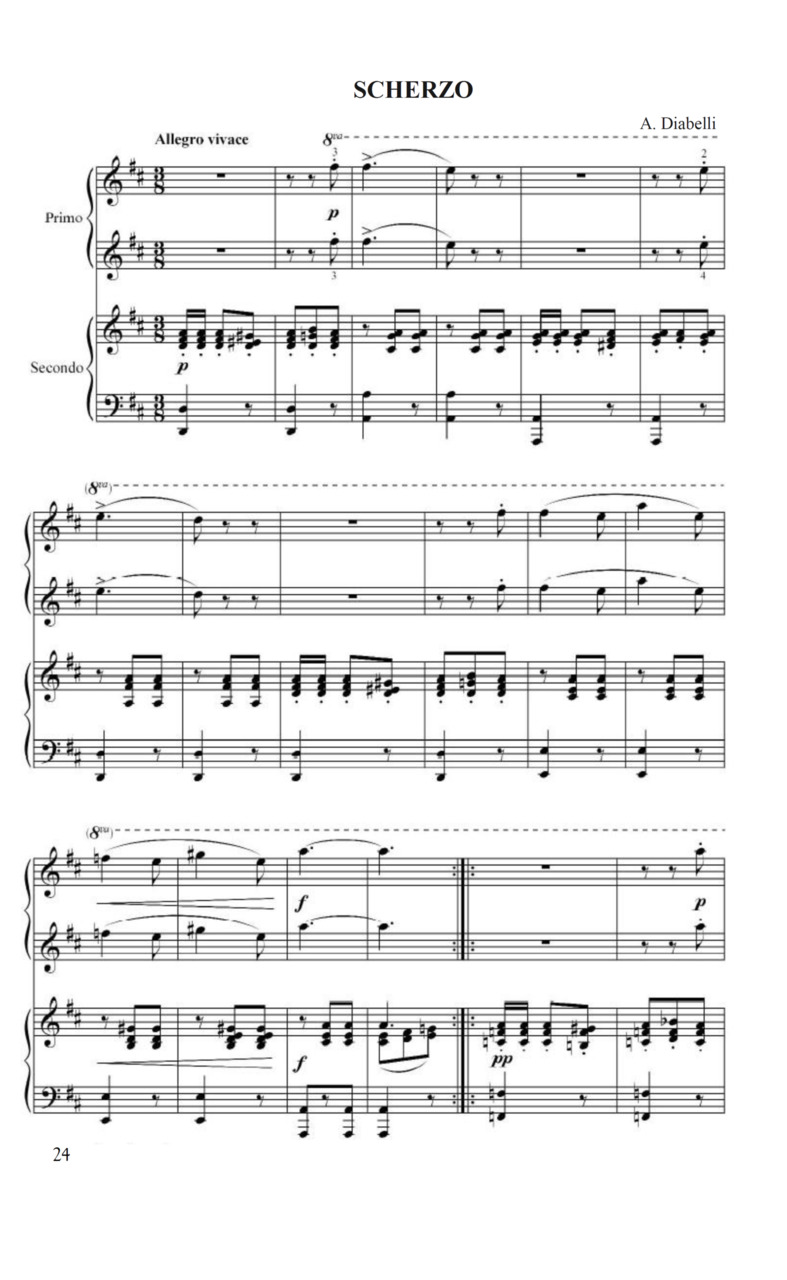
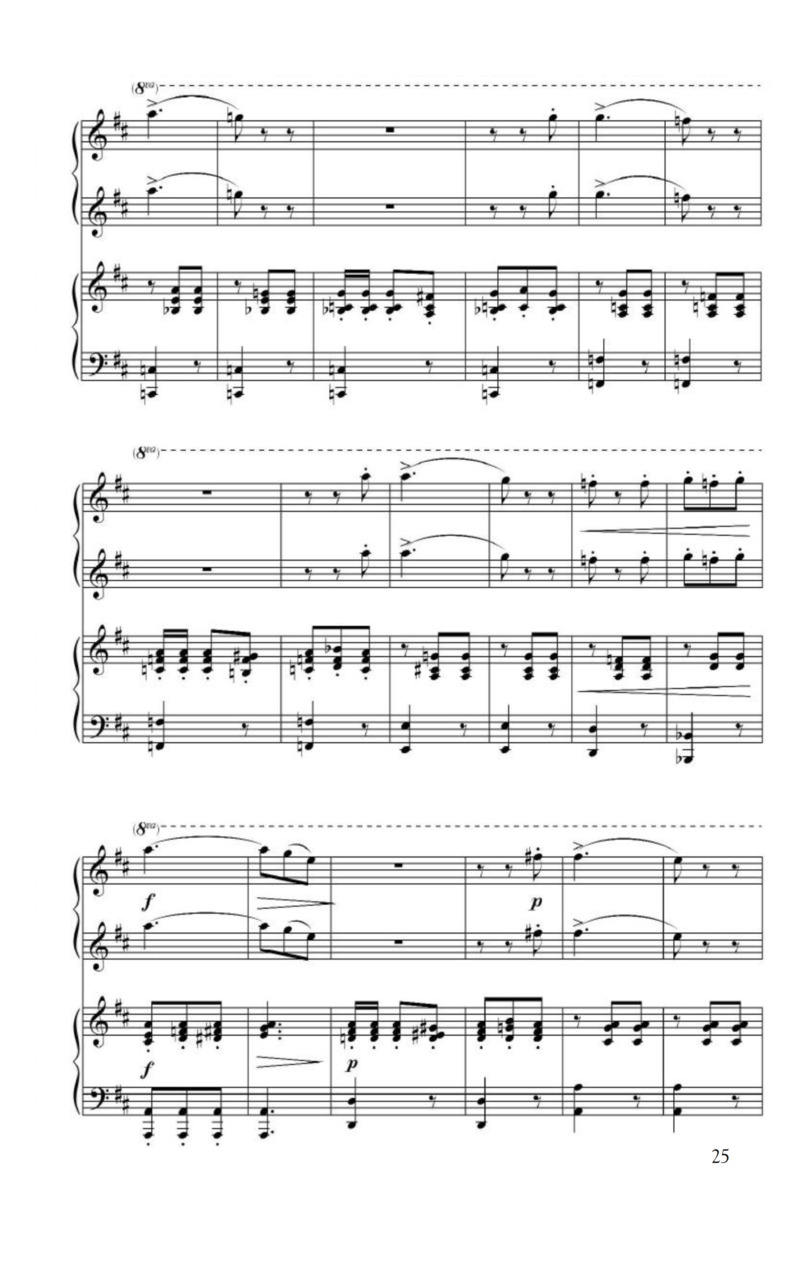
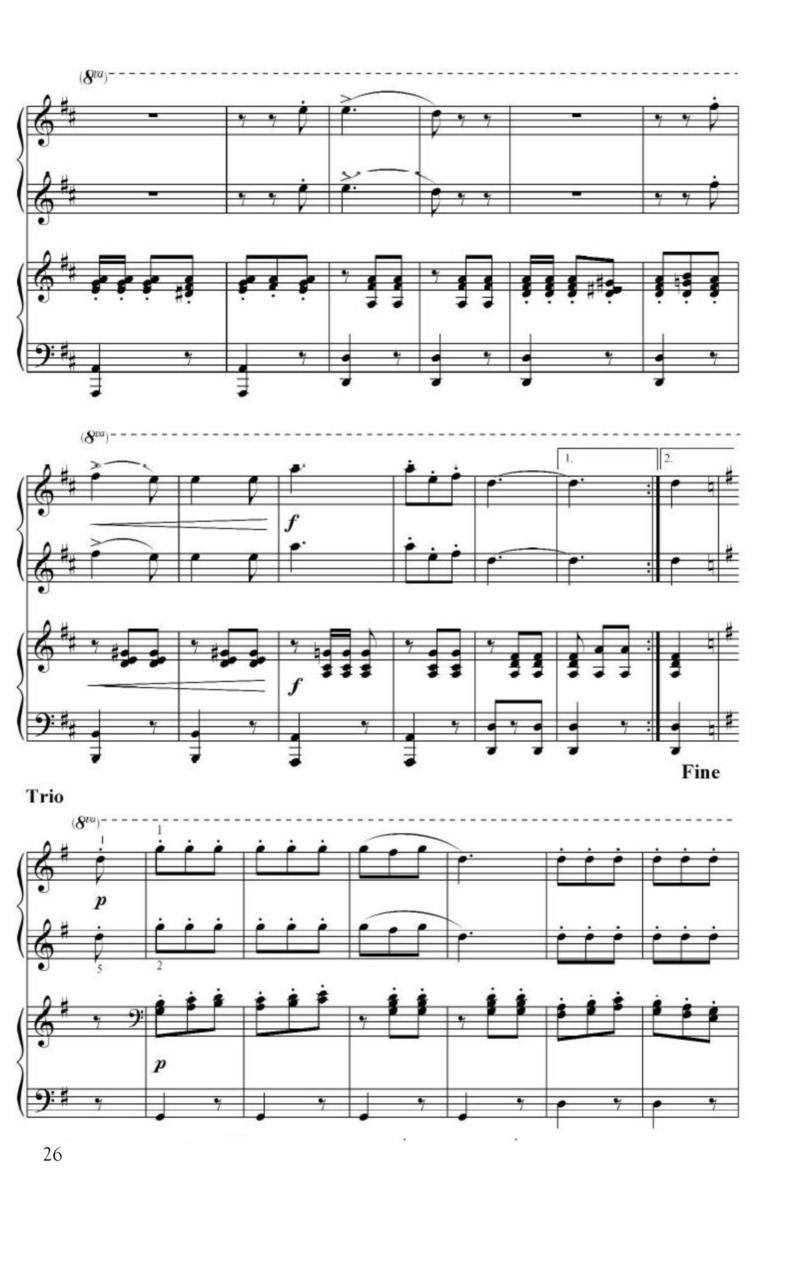
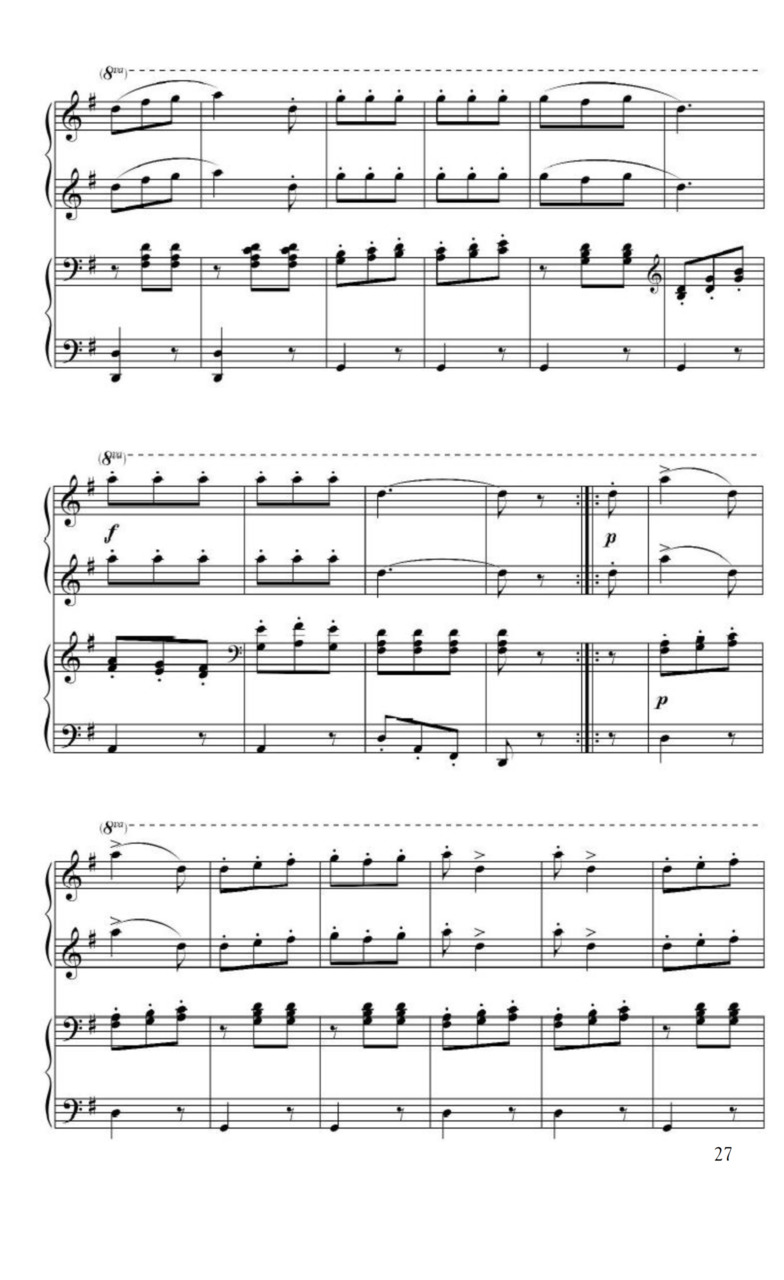
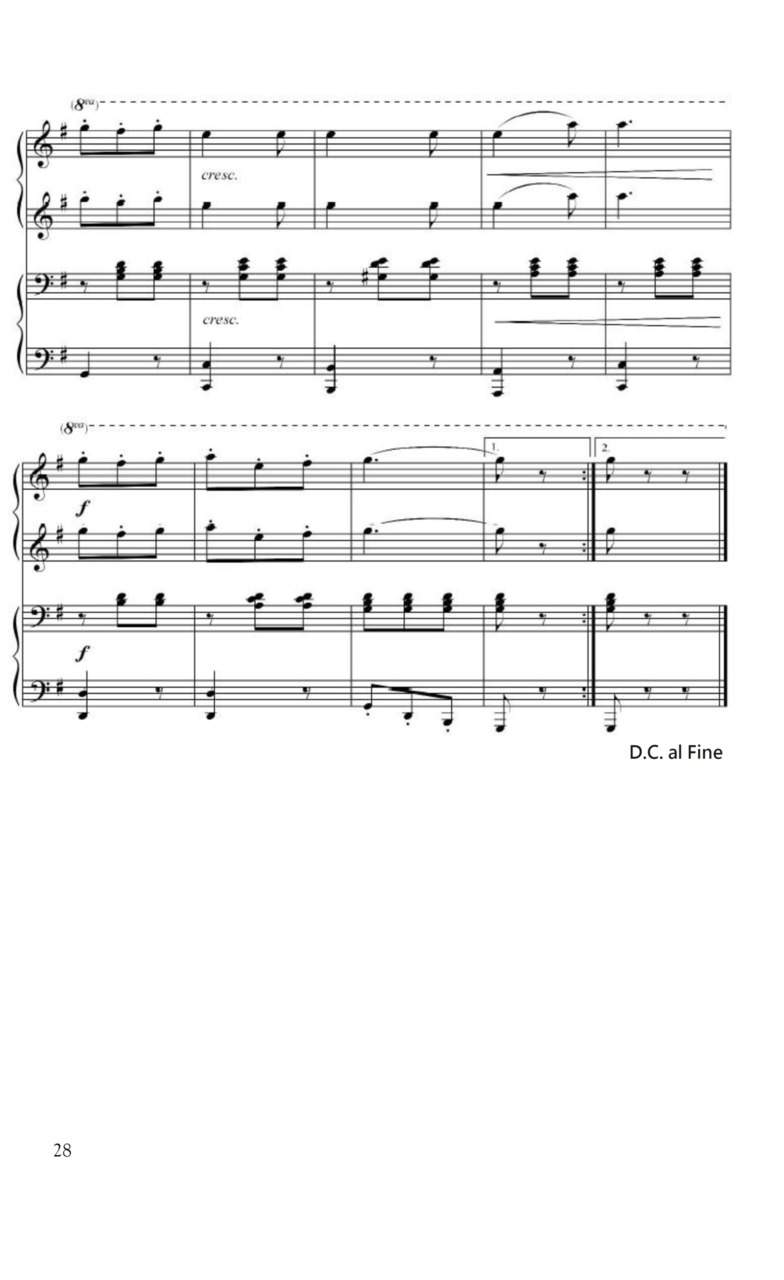
A. Diabelli «SCHERZO», op. 149 №16
Analyze and read from the sheet. The student plays the first segment. The most important thing is to keep fingers on the designated position and check the resting state of hands before each following sound. Adhere to the slur. Begin working from a very slow tempo, but maintain the pulsation and count out loud. Based on the small part of the composition, demonstrate how to practice at home. Because the sound character of the play should be light, sonorous and playful, your fingertips should «grasp» the keys at ease (especially in staccato), while the weight of the hand is being used only partially, so play «with the support».
LESSON 6
1.Development of auditory conceptions
Listening through the plays for this theme is over. In this lesson, we will work on creating of an independent composition of rhythmic figures and their high-pitched embodiment. We can start from a two-beats unit. Ask the student to compose a rhythmic figure with various durations, at least with a length of four bars. After that, explain the major scale, breaking it down into sub tones and semitones (tone, tone, semitone, tone, tone, tone, semitone), also offer to choose the tonality. Next, the student should play a composed rhythm, having previously determined the character and tempo.
2. Development of motoric conceptions
EXERCISE 6
«Claws»
This exercise is performed similarly to the previous one, but fingers are bent in all joints and fingertips are touching the bases of fingers. Draw student’s attention to the fact, that fingers are bending and straightening, while the palms are always strained. This exercise can be performed in three ways:
a) an active bending of finger joints and a slow straightening;
b) a slow bending of fingers and an active straightening;
c) an active bending and straightening of fingers.
Mentally send signals to your palms and joints (back of hand should not feel tension).
3. Formation of auditory and motoric conceptions
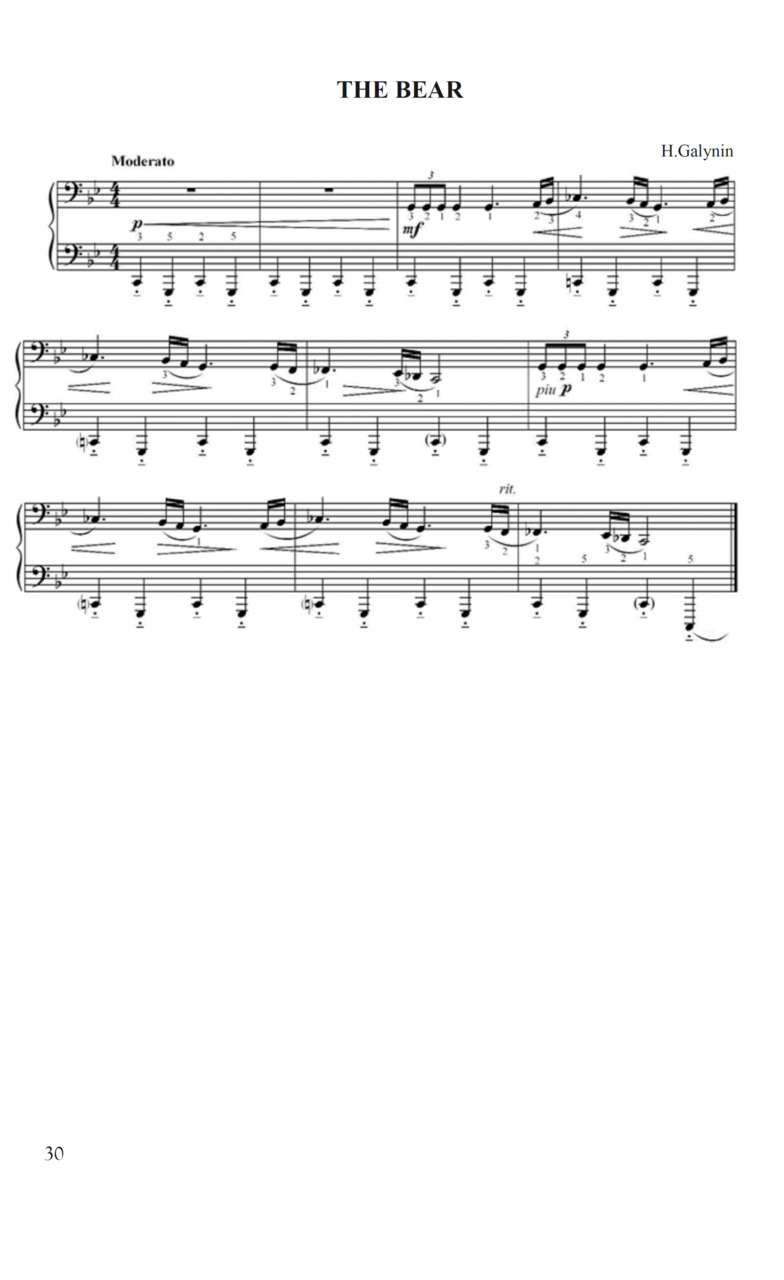
H. Galynin «The bear»
First, clap through the rhythmic pattern for the right hand part, while counting out loud by quarters. Then, try to «imagine» the sound of both parts, determine the way fingers touch the keys and how the hands’ weight is distributed. Further, position your hands and read from the sheet. In order to make coordination of the hands easier, mentally separate them, so the right hand would be the supporting one, while the left would be more active and remain a bit higher than the right one.
LESSON 7
1. Development of auditory conceptions
In this lesson, we compose the rhythmic pattern in the triple beat and minor scale. Teacher explains the minor scale by breaking it down into tones and semitones (tone, semitone, tone, tone, tone, semitone, tone, tone).
2. Development of motoric conceptions
EXERCISE 7
«Small circles»
This is one more exercise, which helps to develop a sense of integrity in your hand.
Initial position: standing, the back is active, arms are raised to the sides, feel them from below till the fingertips, the palms are a bit strained.
Draw small circles with all the fingertips at once, from one side to another. The hand follows the fingertips without bending.
3. Formation of auditory and motoric conceptions
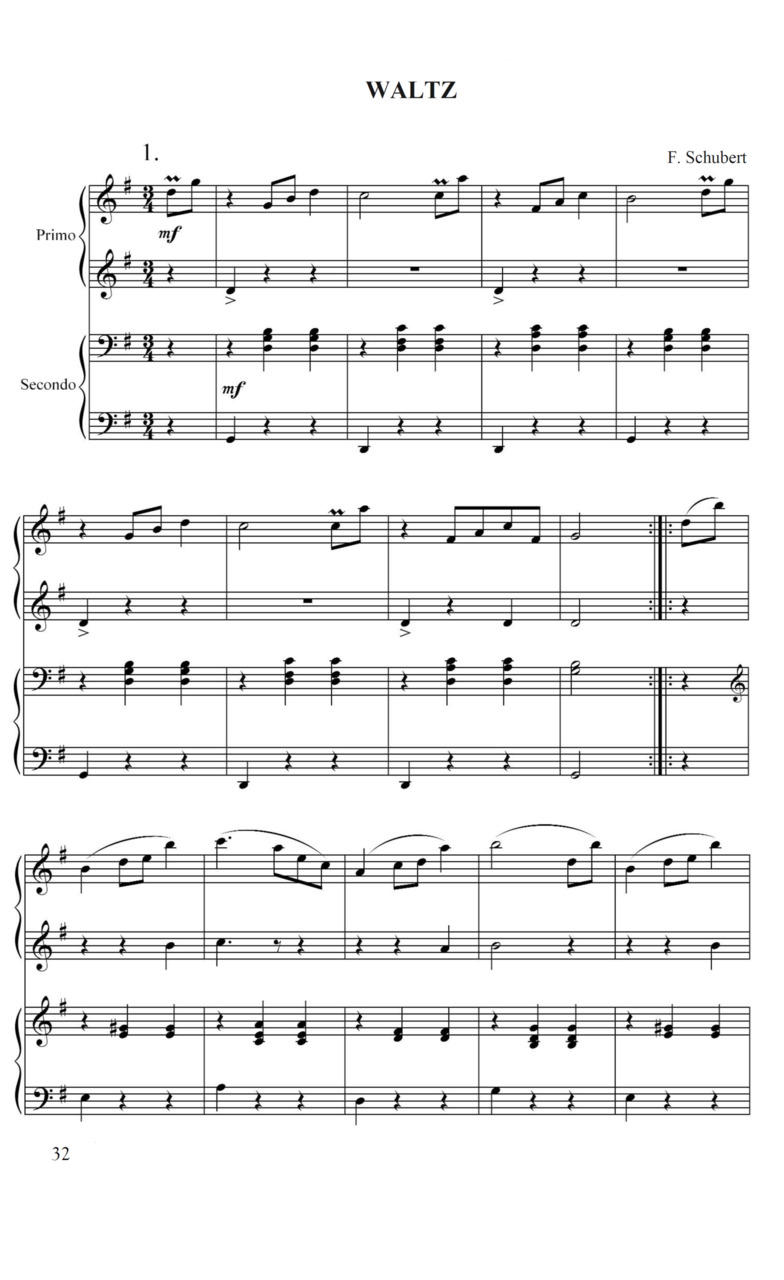
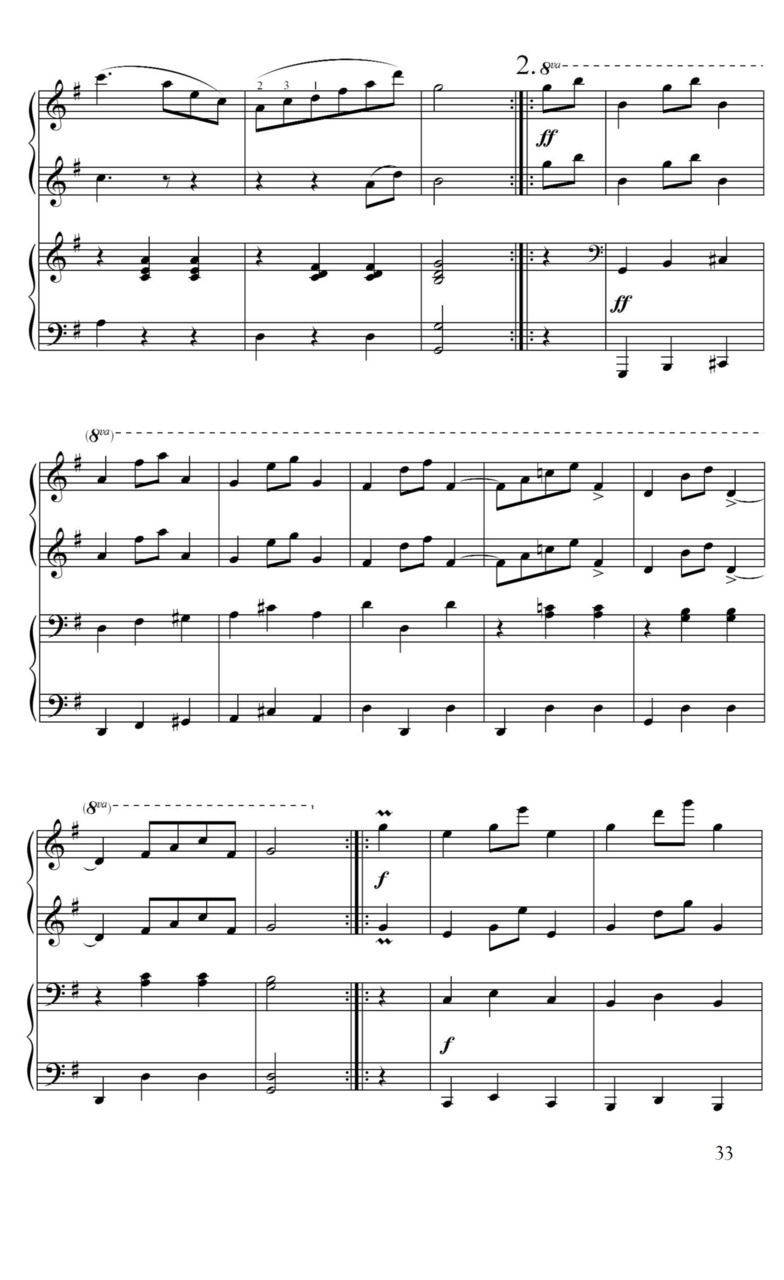
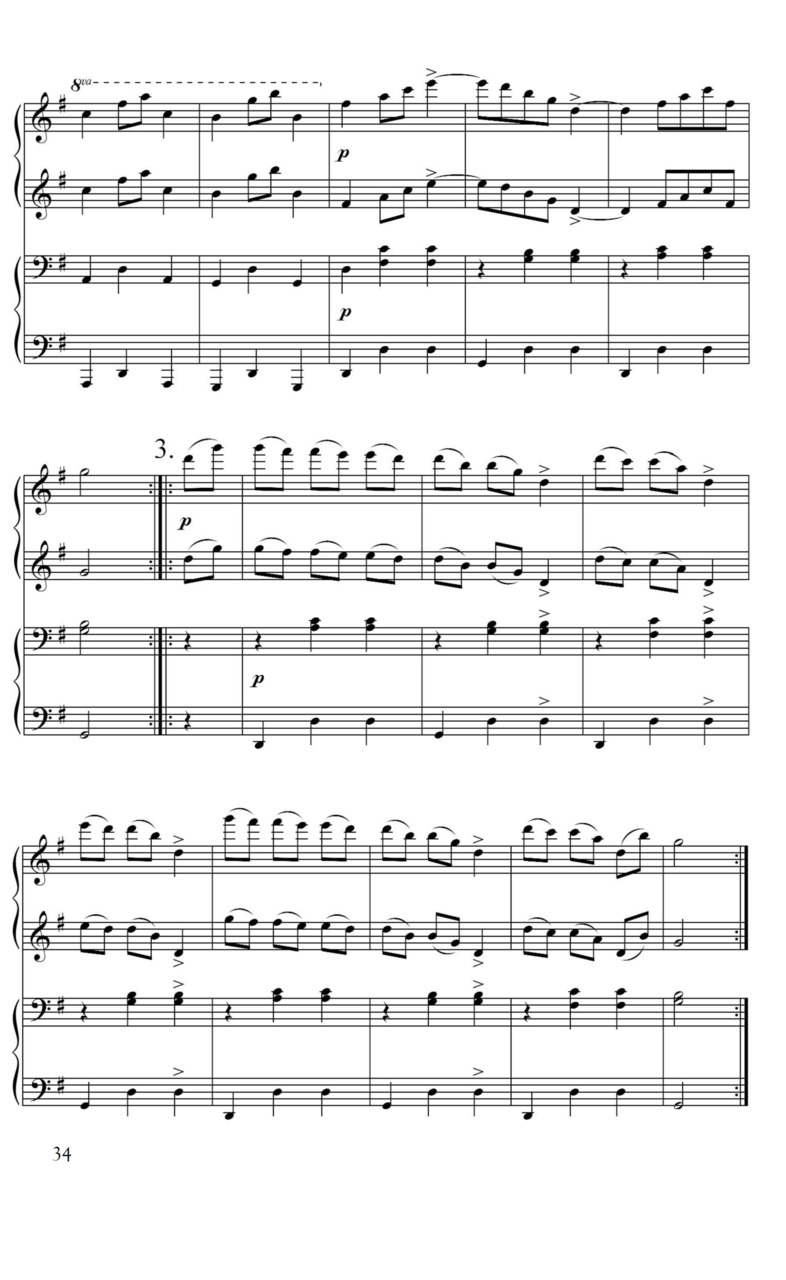
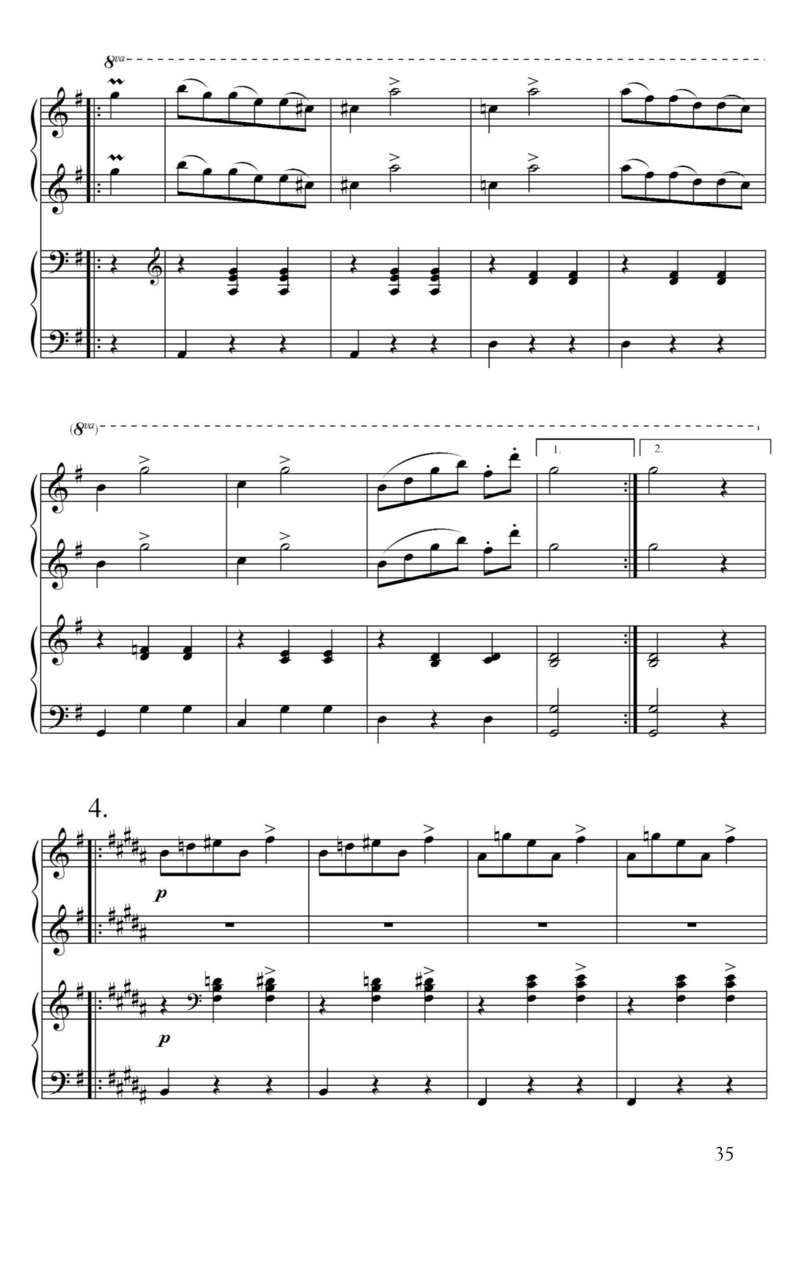
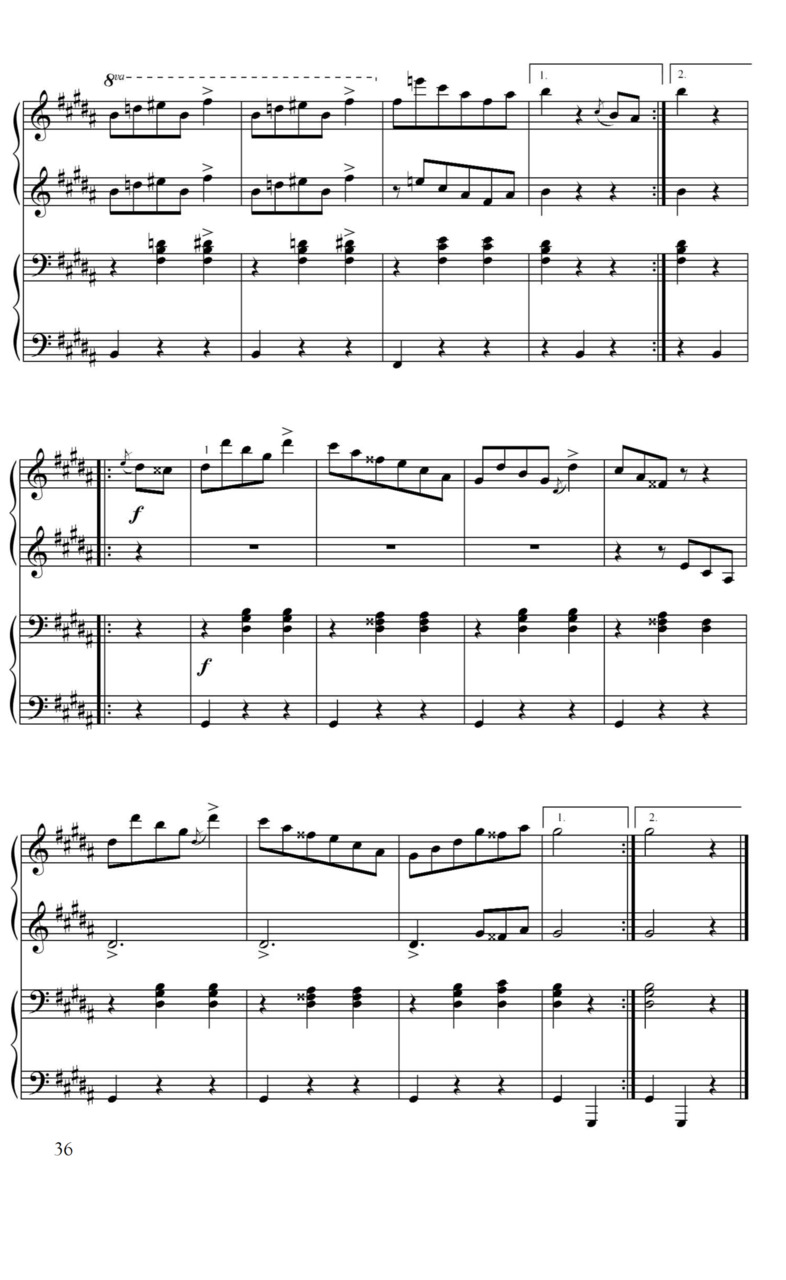
F. Schubert «Waltz»
First, analyze F. Schubert’s «Waltz». Try to imagine the pulsation of the waltz («one» is the main beat, «three» is stretching into «one»). Character of the sound attack in this case is soft, so fingers are smoothly stroking the keys. The weight of both hands is fully used, use the power of your back to hold the arms.
Read from the sheet. The student plays the first part. When performing the composition, keep in mind the following points:
— fingers are put onto the position right away;
— mentally «separate» hands (the right one is supporting);
— in order to make music ornaments easy, first, put your fingers on two adjacent keys, then «imagine» how the second sound «sol» strikes into the pulsation (you need to «grasp» it with your fingertip), and only then perform this short trill, or inverted mordent.
LESSON 8
(final)
Performance:
— 2—3 compositions solo and in the ensemble;
— unfamiliar composition from the sheet.
Evaluation:
— clarity of the sound character and sound extraction technique;
— accuracy of the pulsation.
Unfamiliar composition is played from the sheet after preliminary analysis and mental execution. The analysis includes following steps:
a) determine tonality, size and unit of movement;
b) determine character of the sound and a necessary sound extraction technique.
During a mental execution (simultaneously auditory and motoric conceptions), consciously control the sounds, striking into the pulsation.
Preparation for the concert performance includes several points:
— The student knows the composition by heart and is able to mentally perform it, while consciously controlling the pulsation.
— The teacher checks student’s ability to «hear» the composition mentally. For this, choose the pace and count down one bar, and then, together with the student start «imagining» the sound. At any time, the teacher can ask the student to stop mental conception and name the notes which strike into the pulsation.
— The student prepares for a stage performance according to the following steps: first, check a position of the legs and activity of the back, put your hands in an accurate position. Then, mentally «imagine» the sound of a beginning part and, simultaneously, start feeling the energy flow through hands, palms, fingertips and keys into the strings. Only after such an entry into a desired physical and emotional state, you can start playing.
PART II
Topic II. INTONATION
As a result of studying this topic, student should master following aspects:
1. In auditory conceptions:
— determine the intonation structure of the voice (motive, phrase, sentence)
2. In motoric conceptions:
— consciously coordinate the work of hands and fingers
3. In auditory-motoric conceptions (while playing the musical instrument)
— consciously articulate any voice
LESSON 1
1. Development of auditory conceptions
In order to be able to speak the musical language, you need to gain a solid understanding of it. Same as with the normal language, you can hear separate sentences in each voice (where the thought is finished), phrases (where you can put comma) and words — motives. Sentences and phrases are usually the easiest to determine, while distinguishing motives one from another is a more difficult task. In the motive, same as in the word, there is usually one accent, and pulsation plays the role of an intonation accent. Therefore, first of all, you need to determine the rhythmic pulsation and then look for motives. The motive can consist of even just one sound, for example, in the play «The Sick Doll» by P. Tchaikovsky. Listen to the following play and search for sentences, phrases and motives (in the beginning of the play those are 8 bars, 4 bars and 1 bar accordingly).
2. Development of motoric conceptions
Here we learn how to control the movements of fingers and hands simultaneously.
EXERCISE 1
Initial position: standing, the back is active, arms are in front, hands are a bit above your wrists.
When drawing big circles in the air, perform the following exercises:
— «Birds» (ex. 3, topic I)
— «Fingers in a fist» (ex. 5, topic I)
— «Claws» (ex.6, topic I)
It is necessary to feel separately evenly moving hands and active, energetic fingers.
3. Formation of auditory and motoric conceptions
F. Couperin «The Cuckoo»
Determine the character of the sound and the sound extraction technique accordingly. In this case it will be as follows: the fingertips are sharp, weight of hands is partially used.
In the play, there are two sentences with 8 bars, phrases with 4 bars, motives consist from 2 sounds (pulsation by eighth).
Бесплатный фрагмент закончился.
Купите книгу, чтобы продолжить чтение.