

Introduction
The History of Russian Cuisine
Russian cuisine is not just a collection of recipes; it is a whole culture that reflects the centuries-old history, traditions, and customs of our people. Each region of Russia has its unique dishes and culinary habits, but at the heart of all these diversities lie common elements that make Russian cuisine so distinctive and recognizable.
Roots of Russian Cuisine
The history of Russian cuisine dates back to ancient times when our ancestors were hunters and gatherers. Their diet was primarily composed of wild plants, berries, fish, and meat. Over time, with the development of agriculture, grain crops (rye, wheat, and barley) became actively included in their diet. These products formed the basis of many traditional dishes, such as porridge and bread.
With the advent of Christianity in the 10th century, culinary traditions began to change. During this time, lean dishes became popular, as the church prescribed certain days for abstaining from meat and dairy products. This led to a variety of vegetable and mushroom dishes, as well as the creation of various pickles and marinades, which still hold an important place on our table today.
Influence of Neighbors
Russian cuisine did not develop in isolation. Over the centuries, it has been influenced by neighboring cultures. For example, the Mongol invasion in the 13th century brought new methods of preparing meat and dairy products. In the 16th and 17th centuries, during the reign of Tsar Ivan the Terrible, Italian and French culinary traditions were introduced to Russia, leading to the emergence of new dishes and techniques, such as baking and the use of sauces.
Siberia and the Far East also contributed to Russian cuisine. With the introduction of new products, such as fish, venison, and wild berries, the variety of dishes became even richer. This was a time when Russian cuisine began to acquire its unique features, combining elements from various cultures.
Traditional Dishes
Among the many traditional dishes that we know today, special mention goes to borscht, dumplings (pelmeni), pancakes (blini), porridge, and various pies. These dishes are not only delicious but also rich in symbolism and history. For example, borscht is not just a soup; it symbolizes home comfort and family traditions. Dumplings, which were once food for travelers, have become an integral part of Russian cuisine and are popular throughout all regions of Russia.
Modern Trends
Today, Russian cuisine continues to evolve. Young chefs strive to combine traditions with modern culinary techniques, creating new flavor combinations and original presentations. We see how classic dishes take on new forms, and ancient recipes are adapted to contemporary demands.
However, despite these changes, Russian cuisine retains its roots and spirit. It is a cuisine that brings people together, creates comfort, and fills homes with warmth and joy. In every plate, in every recipe, there is the story of the Russian people, their traditions, and culture.
In the next chapter, we will take a closer look at the main ingredients that form the foundation of Russian cuisine and their significance in the preparation of dishes.
Main Ingredients of Russian Cuisine and Their Significance
Russian cuisine is a rich and diverse world where each ingredient plays its unique role. In this chapter, we will explore the main products that form the basis of many traditional dishes and discover their significance not only in cooking but also in the culture of the Russian people.
1. Bread
Bread is the foundation of Russian cuisine and a symbol of home comfort. In Russia, there are many types of bread: rye, wheat, with seeds and spices. Rye bread holds a special place in our diet as it is rich in fiber and vitamins. There is even a saying: «Bread is the head of everything,» which emphasizes the importance of this product in Russian culture.
An interesting fact: in ancient times, bread was not only eaten but also used in rituals. For example, at weddings, a loaf of bread (karavai) was gifted to the newlyweds, symbolizing prosperity and well-being in the family.
2. Porridge (Kasha)
Porridge is another symbol of Russian cuisine. It is made from various grains: buckwheat, oats, rice, and barley. Each type of porridge has its characteristics and can be served either sweet or savory. Buckwheat porridge, for instance, is known for its health benefits: it contains a lot of protein and vitamins and is an excellent source of energy.
Porridge is often associated with simplicity and heartiness, making it an ideal dish for any time of year. Interestingly, in Russia, porridge was not only a daily meal but also used in festive feasts. For example, during Maslenitsa, a sweet porridge with honey and berries was prepared.
3. Vegetables and Fruits
Vegetables and fruits hold an important place in Russian cuisine. Cabbage, beets, carrots, and potatoes are all not only tasty but also nutritious. Cabbage, for example, is the basis for the famous borscht and sauerkraut, which is an excellent source of vitamin C and probiotics.
Among fruits, special attention should be given to apples and berries. Apples are often used in baking, while berries are used in jams and desserts. Interestingly, Russia has many varieties of wild berries, such as lingonberries, cranberries, and blueberries, which are gathered in the forests and used in cooking.
4. Meat and Fish
Meat and fish are important sources of protein in Russian cuisine. Traditionally, beef, pork, chicken, as well as game and fish are used. Dumplings (pelmeni), for example, are made with various fillings, from pork and beef to fish and mushrooms.
Fish, especially river fish, also plays a significant role in our diet. Salted and smoked fish is often served on festive tables, and «ukha» is a traditional Russian fish soup that is cooked outdoors.
5. Dairy Products
Dairy products, such as sour cream, cottage cheese, and kefir, are an integral part of Russian cuisine. Sour cream is used as a sauce for many dishes, while cottage cheese is used for making pies and desserts. Kefir, in turn, is known for its health benefits and is an excellent source of probiotics.
An interesting fact: in Russia, kefir is considered not just a food product but also a means of maintaining health. Many people consume it to improve digestion and overall well-being.
6Spices and Seasonings
Although Russian cuisine is not famous for its abundance of spices, some play an important role in creating the flavor of dishes. Dill, parsley, garlic, and black pepper are the main seasonings that are often used in cooking. Dill, for example, is added to salads, soups, and meat dishes, giving them a fresh and aromatic taste.
Additionally, spices such as bay leaf and mustard are popular in Russian cuisine, adding zest and depth of flavor.
The main ingredients of Russian cuisine are not just products; they form a whole palette of flavors and aromas that shape Russian culinary tradition. Each of them has its own story and significance, reflecting the richness and diversity of Russian culture. In the next chapter, we will dive into the world of traditional dishes that have become symbols of our cuisine and learn how to prepare them.
Tips for Cooking and Serving
Russian cuisine is not just a collection of recipes but an entire art form that requires attention to detail, an understanding of traditions, and, of course, a love for the cooking process. In this chapter, I will share useful tips for cooking and serving dishes that will help you create a true Russian table and impress your loved ones.
1. Choosing Quality Ingredients
The first rule of successful cooking is selecting quality ingredients. Russian cuisine focuses on fresh and natural products. Here are some tips for choosing them:
Vegetables and Fruits: Opt for seasonal products. They are not only tastier but also healthier. For example, in the fall, use pumpkin and beets, while in the summer, fresh cucumbers and tomatoes are ideal.
Meat and Fish: Try to buy meat and fish from trusted suppliers. Pay attention to color and smell — fresh meat should have a vibrant color and a pleasant aroma.
Dairy Products: Choose products with minimal preservatives and additives. Real sour cream should be thick and have a characteristic sour-milk taste.
2. Cooking Techniques
There are many cooking methods in Russian cuisine, each with its own features. Here are some basic techniques:
Stewing: This is one of the most popular cooking methods in Russian cuisine. It allows you to preserve all the juices and aromas of the ingredients. For example, stewed cabbage with meat is a classic dish that takes time but is worth the effort.
Baking: Baking in the oven is a great way to prepare meat and fish. Use foil or parchment paper to retain juices and flavors. Try baking chicken with potatoes and spices — it’s a simple yet very tasty dish.
Boiling: Boiling is the primary method for making soups and porridges. To make a rich soup, add meat and simmer on low heat. Don’t forget to skim off the foam; this will help make the broth clear. For added appetizing appeal and clarity, you can strain the broth for cabbage soup through a sieve.
3. Herbs and Spices
Proper use of herbs and spices is the secret to creating a unique flavor in dishes. Here are some tips:
Dill and Parsley: These herbs are commonly used in Russian cuisine. Add them to dishes at the end of cooking to preserve their bright aroma.
Garlic: It adds a piquant touch to dishes. Use it fresh for salads or as a seasoning for meat. But be cautious — too much garlic can overpower the flavors of other ingredients.
Salt and Pepper: Don’t forget the basics. Salt enhances flavor, while black pepper adds spiciness. However, try not to oversalt dishes — it’s better to add salt at the end of cooking.
4. Table Setting
Table setting is an important part of a Russian feast. Proper presentation of dishes creates a festive atmosphere. Here are some serving tips:
Plates: Choose traditional Russian plates, such as Gzhel or Khokhloma. They are not only beautiful but also emphasize national character.
Napkins: Use cloth napkins folded into triangles or diamonds. This will add sophistication to your table setting.
Dishes: Serve food in large portion plates so guests can help themselves. This creates an atmosphere of friendliness and community.
5. Traditions and Customs
Don’t forget the traditions that make Russian cuisine unique. For example:
Karavai: At weddings and other celebrations, it is important to serve a karavai. This symbolizes prosperity and well-being. It is usually decorated with dough patterns.
Tea: In Russia, it is customary to drink tea after meals. Serve jam, honey, or sweets with tea. This makes for a great conclusion to the meal.
Cooking and serving dishes from Russian cuisine is not only a process but also an opportunity to create an atmosphere of warmth and comfort. By following these tips, you will not only be able to prepare delicious dishes but also give your loved ones unforgettable moments at the table. In the next chapter, we will dive into the world of traditional Russian dishes and their recipes that are a must-try!
Interesting Facts
Here are some interesting facts about specific dishes in Russian cuisine:
1. Borscht
Variety of Recipes: Borscht has many variations across different regions of Russia and other Eastern European countries. For example, in Ukraine, it is made with cabbage, while in Russia, it often includes meat and potatoes.
Secret Ingredient: Many chefs add a bit of vinegar or lemon juice to borscht to enhance the flavor of the beets and give the dish a vibrant color.
History: Borscht is considered one of the oldest dishes in Slavic cuisine. Its roots go back centuries, and there are many legends about its origin.
2. Pelmeni
Siberian Origin: Pelmeni originated in Siberia, where they were prepared as «traveler’s food.» They could be stored for a long time in the freezer, making them ideal for long journeys.
Family Symbol: In some families, there is a tradition of gathering all family members to make pelmeni together. It’s not just a cooking process but also an opportunity to spend time together.
Filling: Traditionally, pelmeni are filled with meat (usually a mix of pork and beef), but there are also vegetarian options with mushrooms, potatoes, or cabbage.
3. Blini
Maslenitsa Festival: Blini symbolize the sun and the arrival of spring. During Maslenitsa, they are made in large quantities, and each day of the week is dedicated to a specific type of blin.
Variety of Fillings: Blini can be served with both savory fillings (such as caviar or fish) and sweet ones (with jam, honey, or condensed milk).
Thin and Thick: In Russia, there are different types of blini: thin ones (for stuffing) and thick ones (similar to American pancakes).
4. Ukha
Fish Soup: Ukha is not just a fish soup; it is a whole culinary tradition. There are many recipes, and each fisherman has their own «secret» way of preparing it.
Ingredients: Ukha typically uses several types of fish, along with potatoes, carrots, onions, and herbs. The more types of fish used, the richer the flavor.
Serving: Ukha is often served with rye bread and dill, along with a shot of vodka, making it not just a dish but also part of a traditional feast.
5. Kasha
Grain as a Base: Kasha is a staple dish made from various grains, such as oats, buckwheat, rice, and barley. Each type of kasha has its unique nutritional properties.
Sweet and Savory: Kasha can be prepared in both sweet and savory variations. For example, semolina kasha is often served with sugar and butter, while buckwheat is served with meat or vegetables.
Symbol of Prosperity: In Russian culture, kasha is considered a symbol of abundance and well-being. In some regions, it is prepared for holidays and celebrations.
6. Herring Under a Fur Coat (Shuba)
Layered Salad: This popular salad consists of layers of boiled herring, potatoes, carrots, beets, and mayonnaise. Each layer adds a unique flavor and texture to the dish.
Origin Story: Herring under a fur coat appeared in Russia in the early 20th century and quickly gained popularity on festive tables.
Creative Variations: There are many variations of this salad, including vegetarian versions without fish or with added ingredients like apples or mushrooms.
7. Okroshka
Summer Soup: Okroshka is a cold soup that is perfect for hot summer days. It is made with kvass or kefir and contains chopped vegetables, meat, and herbs.
Variety of Ingredients: Almost any fresh vegetables and leftover meat can be added to okroshka, making it a versatile dish.
History: Okroshka has ancient roots and likely originated as a way to use up food scraps.
These facts highlight the richness and diversity of Russian cuisine, as well as its connection to cultural traditions and history.
Section 1: Appetizers
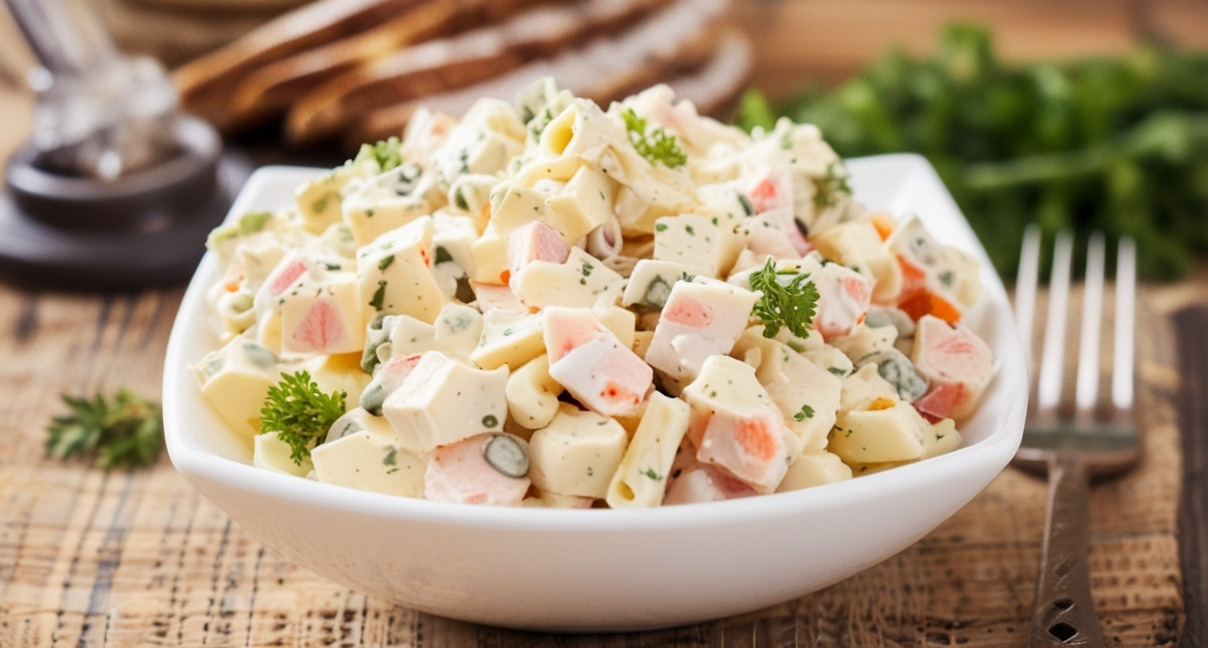
Crab Stick Salad
Crab stick salad is a light, delicious, and very easy-to-make dish that is perfect for a festive table or as an everyday snack. It combines the tender taste of seafood with the freshness of vegetables. Let’s go through how to prepare this salad and share some useful tips and interesting facts.
Ingredients:
Crab sticks — 200 g
Chicken eggs — 3 pcs
Fresh cucumber — 1 pc (you can also use pickled cucumber if desired)
Canned corn — 1 can (340 g)
Mayonnaise — 3—4 tablespoons (to taste)
Fresh dill — a small bunch (optional)
Green onion — 1 stalk (optional)
Salt and pepper — to taste
Directions
Ingredient Preparation:
Boil the eggs in boiling water for 10 minutes. After that, cool them under cold water, peel, and cut into cubes.
Cut the crab sticks into pieces about 1 cm long. If they are frozen, let them thaw before cutting.
Dice the cucumber into small cubes. If using pickled cucumber, be sure to taste it to avoid over-salting the salad.
Mixing Ingredients:
In a deep bowl, combine the chopped crab sticks, eggs, cucumber, canned corn (drained), and green onion.
Add mayonnaise and mix all the ingredients until well combined. If necessary, add salt and pepper to taste.
Serving:
Transfer the salad to a serving bowl or a flat dish. For decoration, you can sprinkle finely chopped dill on top.

Cooking Tips
For a Richer Flavor: Try adding a bit of lemon juice or mustard to the mayonnaise in the salad. This will give it a fresh and slightly tangy kick.
Texture: If you want the salad to be crunchier, add some fresh bell pepper or radishes.
Prepare in Advance: The salad can be prepared ahead of time, but do not add the mayonnaise until serving to prevent it from getting soggy. Store it in the refrigerator in a sealed container.
Interesting Facts
History of Crab Sticks: Crab sticks were developed in Japan in the 1970s and quickly gained popularity worldwide. They are made from surimi — processed fish — which makes them affordable and accessible.
Health Benefits: Crab stick salad can be low in calories if you use light mayonnaise or substitute it with yogurt. It’s a great option for those who are watching their diet.
Variations: There are many variations of this salad. You can add avocado, rice, or even seaweed for a different taste and texture.
Now you know how to prepare a delicious and appetizing crab stick salad. This dish will make a great addition to your table. Enjoy your meal!
Herring Under a Fur Coat
Ingredients:
Herring fillet — 300 g
Potatoes — 3—4 pcs (medium-sized)
Carrots — 2 pcs
Beets — 1—2 pcs (depending on size)
Eggs — 3 pcs
Onion (optional) — 1 pc
Mayonnaise — 200 g
Fresh dill — for decoration
Salt and pepper — to taste
Directions
Ingredient Preparation:
Boil the potatoes, carrots, and beets in their skins until cooked. This will preserve their flavor and nutrients. Cool and peel them.
Hard boil the eggs (about 10 minutes after boiling). Cool and peel.
Chopping:
Cut the herring fillet into small cubes.
Grate the potatoes and carrots on a coarse grater.
Grate the beets on a coarse grater or cut them into small cubes.
Separate the eggs into whites and yolks. Grate the whites, and you can mash the yolks with a fork.
Assembling the Salad:
On a flat dish, lay the first layer — half of the grated potatoes. Lightly salt and spread with mayonnaise.
For the second layer, add the herring. Again, spread with mayonnaise.
The third layer is the grated carrots. Lightly salt and spread with mayonnaise.
The fourth layer is the grated egg whites. Spread with mayonnaise.
The fifth layer is the grated beets. Spread with mayonnaise and carefully smooth it out.
Finish the salad with the grated yolks, sprinkling them on top for decoration.
Chilling:
Refrigerate the salad for at least 2—3 hours, preferably overnight. This will allow all the flavors to meld and make the dish more flavorful.
Serving:
Before serving, decorate the salad with fresh dill. You can also add a few lemon slices for brightness.
Cooking Tips
For a Richer Flavor: Use pickled herring or add a bit of lemon juice to the mayonnaise. This will give the dish a fresh taste.
To Prevent Beets from Coloring Other Layers: You can coat the beets with mayonnaise beforehand. This will prevent them from staining the other ingredients. However, in this case, the red color will not be as vibrant, and the salad will be less contrasting.
For a Lighter Option: Substitute mayonnaise with Greek yogurt or mix them in equal parts.
Interesting Facts
Origin: Herring under a fur coat appeared in Russia in the early 20th century and quickly became popular on festive tables, especially for New Year’s and other celebrations.
Symbol of Winter: Herring under a fur coat is associated with winter holidays and has become an integral part of Russian culinary tradition.
Culinary Experiment: Variations of this salad exist in different countries. For example, in some regions, apples or peas are added, giving the dish a unique flavor.
Enjoy your meal! Herring under a fur coat is not only a delicious dish but also a beautiful one that will adorn any festive table.
Olivier Salad
Ingredients:
Potatoes — 3—4 pcs (medium-sized)
Carrots — 2 pcs
Eggs — 4 pcs
Pickled cucumbers — 3—4 pcs
Green peas (canned) — 1 can (400 g)
Chicken fillet (or sausage/ham) — 300 g
Onion (optional) — 1 pc
Mayonnaise — 200—250 g
Salt and pepper — to taste
Greens (dill or parsley) — for decoration
Directions
Ingredient Preparation:
Boil the carrots and potatoes in their skins until cooked. Once cooled, peel and cut into cubes.
Hard boil the eggs (about 10 minutes), cool, peel, and chop finely.
If using chicken fillet, boil it until cooked, cool, and cut into cubes. Ham or sausage can simply be cut into cubes.
Assembling the Salad:
In a deep bowl, mix all the prepared ingredients: potatoes, carrots, eggs, pickled cucumbers, chicken (or ham/sausage), and green peas.
If desired, add finely chopped onion for a sharper flavor.
Dress the salad with mayonnaise, adding salt and pepper to taste. Mix well to ensure all ingredients are evenly combined.
Serving:
Transfer the salad to a beautiful serving dish. Garnish with greens before serving at the table.
Cooking Tips
Ingredient Selection: Use high-quality and fresh products. For a richer flavor, opt for homemade mayonnaise or make it yourself.
Chilling: Let the salad sit in the refrigerator for at least 1—2 hours before serving to allow all the flavors to blend better.
Variations: Instead of chicken, you can use boiled beef or sausage. You can also add a bit of apple for a touch of sweetness and freshness.
Interesting Facts About Olivier Salad
History: Olivier Salad was created in the 1860s by chef Lucien Olivier at the «Hermitage» restaurant in Moscow. The original recipe included more gourmet ingredients, such as crayfish tails, quail eggs, and wild mushrooms.
Holiday Symbol: Olivier has become an integral part of the New Year’s table in Russia and other CIS countries, associating it with celebrations and family gatherings.
Regional Variations: Different countries have their own versions of Olivier, using various ingredients. For example, in Latin American countries, it is often prepared with avocado.
Olivier Salad is not just a dish; it is a part of a culinary tradition that unites generations and creates a festive atmosphere. Enjoy your meal!
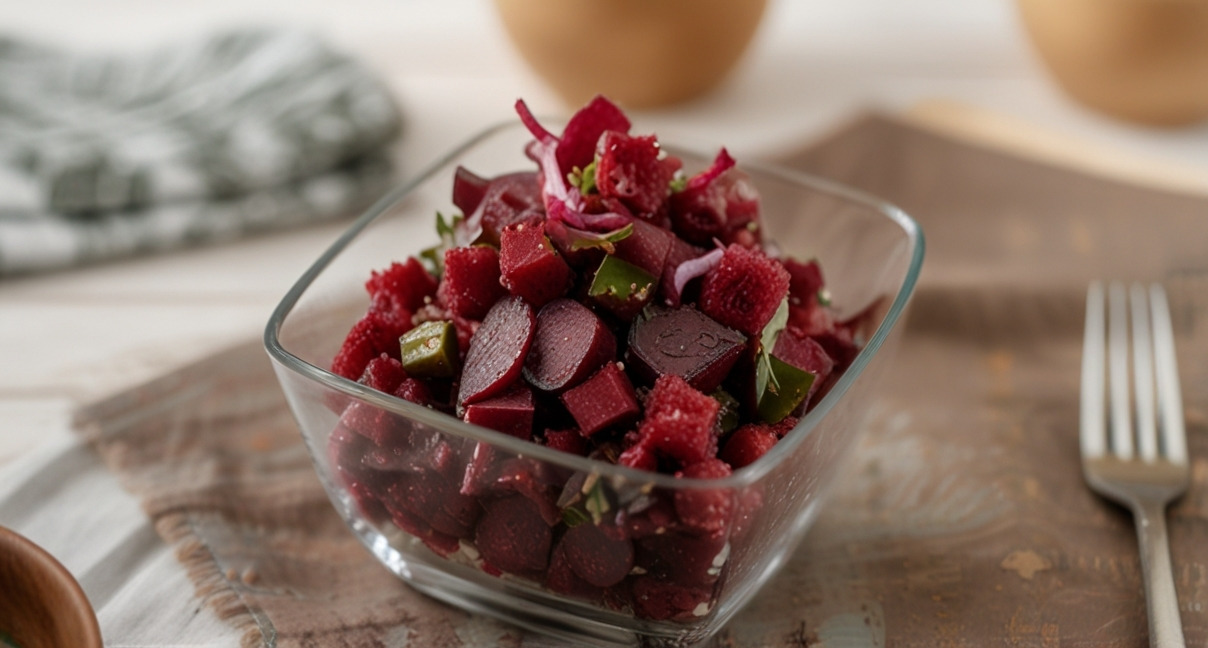
Vinaigrette
Vinaigrette is a classic Russian salad that combines the freshness of vegetables with a sweet and sour dressing. It is not only delicious but also healthy due to the variety of ingredients. Let’s go through how to prepare a tasty vinaigrette.
Ingredients:
Beets — 2 pcs (medium-sized)
Potatoes — 2 pcs (medium-sized)
Carrot — 1 pc (medium-sized)
Sauerkraut — 200 g (optional)
Cucumbers (pickled or fresh) — 2 pcs
Onion (optional) — 1 pc
Green peas (canned) — 1 can (300 g)
Vegetable oil — 3—4 tbsp
Vinegar (9%) — 1—2 tbsp (to taste)
Salt and black pepper — to taste
Greens (dill or parsley) — for decoration
Directions
Preparing the Vegetables: Thoroughly wash the beets, potatoes, and carrots. Boil them in their skins until cooked. Beets should be boiled separately to prevent coloring the other vegetables. This usually takes about 30—40 minutes.
Cooling: After boiling, allow the vegetables to cool. Then peel them and cut into cubes of about 1 cm.
Mixing the Ingredients: In a deep bowl, combine the diced beets, potatoes, carrots, sauerkraut, finely chopped cucumbers, and finely chopped onion. Add the green peas (drain the liquid beforehand).
Dressing: In a separate bowl, mix the vegetable oil, vinegar, salt, and black pepper. Dress the salad with this mixture and gently mix to avoid damaging the vegetables.
Serving: Transfer the vinaigrette to a salad bowl, garnish with greens, and serve. Vinaigrette can be served either cold or at room temperature.
Cooking Tips
Color and Flavor: To prevent the beets from coloring the other vegetables, add a little vinegar to the salad — this will help maintain the vibrant colors.
Ingredient Combinations: Feel free to experiment with the ingredients by adding items like boiled beans, apples, or even boiled meat for a heartier version.
Infusion: Let the vinaigrette sit in the refrigerator for 1—2 hours before serving. This will allow the flavors to meld together and make the salad more flavorful.
Dressing: For a more interesting taste, you can add a bit of mustard or honey to the dressing.
Interesting Facts About Vinaigrette
History: Vinaigrette appeared in Russia in the 19th century and became popular due to its simplicity and the availability of ingredients.
Symbol of Health: Vinaigrette is considered one of the healthiest salads because of its high vitamin and fiber content.
Regional Variations: In different regions of Russia, vinaigrette can vary in composition — some places add apples, while others include mushrooms.
Festive Dish: Vinaigrette is often prepared for festive occasions, especially for New Year’s celebrations, where it holds a special place on the table.
Now you know how to prepare a delicious and healthy vinaigrette. Enjoy your meal!
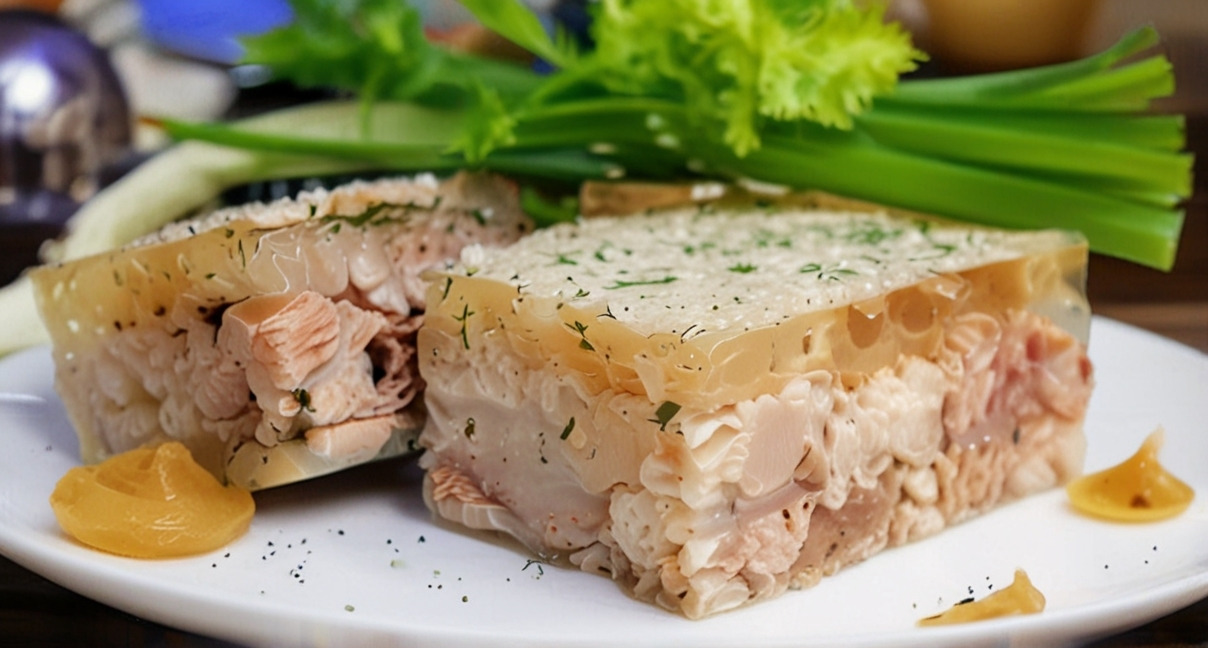
Holodets
Holodets is a traditional Russian dish served cold. It consists of a jelly-like mass made from meat broth with pieces of meat, vegetables, and spices. Not only is it delicious, but it is also very filling. Let’s go through how to properly prepare holodets.
Ingredients:
Meat (pork, beef, or chicken) — 1.5 kg (it’s best to use meat with bones to achieve the jelly consistency)
Carrot — 1 pc
Onion — 1 pc
Garlic — 3—4 cloves (optional)
Bay leaves — 2—3 pcs
Peppercorns — 5—6 pcs
Salt — to taste
Water — 3—4 liters
Greens (dill, parsley) — for decoration
Directions
Preparing the Meat: Rinse the meat well under cold water. Remove excess fat and membranes. If using beef, you can cut it into large pieces; it’s better to leave the pork whole.
Making the Broth: Place the meat in a large pot and cover it with cold water so that it rises 5—7 cm above the meat. Bring to a boil over medium heat, then reduce the heat to low. Skim off any foam that forms on the surface.
Adding Vegetables and Spices: Add the peeled whole carrot and onion, bay leaves, peppercorns, and salt to the broth. Cover with a lid and simmer on low heat for 4—6 hours. The longer you cook it, the richer the broth will be.
Preparing for Cooling: After cooking, remove the meat and vegetables from the broth. Strain the broth through cheesecloth or a fine sieve to eliminate any remaining fat and small particles.
Cooling: Cut the meat into small pieces. In a deep dish or individual bowls, place the pieces of meat and vegetables, if desired. Pour the strained broth over everything. Allow it to cool to room temperature, then refrigerate for 6—8 hours (preferably overnight) to let the holodets set.
Serving: Before serving, cut the holodets into portions, garnish with greens, and serve with mustard or horseradish.
Cooking Tips
Meat Selection: To achieve a richer and clearer broth, use meat with bones (such as pig’s feet or beef ribs). This will help create a jelly-like texture.
Vegetables: To make the holodets look more appetizing, you can add diced boiled carrots and herbs.
Broth Clarity: To ensure the broth is clear, avoid vigorous boiling. Cook on the lowest heat so that it just simmers gently.
Extra Flavor: For a more unique holodets, add a bit of soy sauce to the broth.
Interesting Facts About Holodets
History: Holodets has a long history and was known as far back as Ancient Rome. It became particularly popular in Russia in the 18th century.
Symbol of Celebration: Holodets is often prepared for festive tables, especially for New Year’s and other celebrations.
Health Benefits: Holodets is rich in collagen, which is beneficial for skin, joints, and hair.
Regional Variations: In different regions of Russia, holodets may have its unique features — for example, in some places, gelatin is added to speed up the setting process.
Now you know how to prepare traditional Russian holodets. Enjoy your meal!
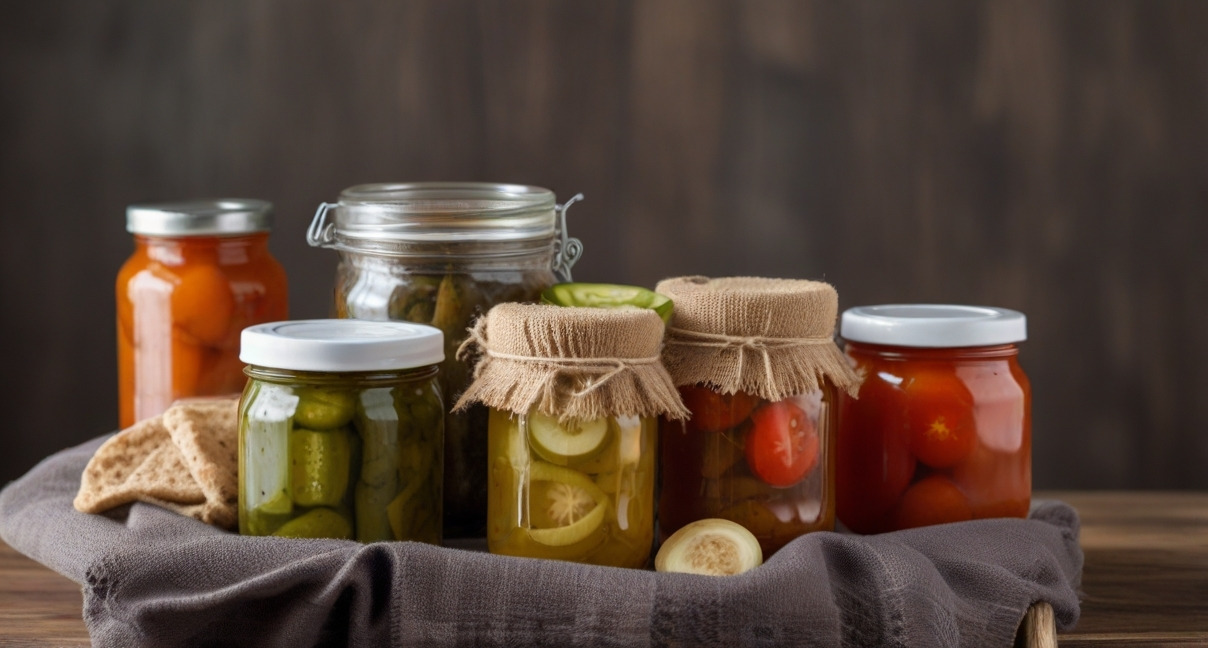
Pickles and Marinades
Pickles and marinades are not only a way to preserve vegetables and fruits for a long time, but also a wonderful method to add vibrant flavors to your dishes. In this chapter, we will explore the main methods of making pickles and marinades, as well as share interesting facts about them.
Basic Preservation Methods
There are several primary methods for preserving vegetables and fruits:
Salting: This method relies on the use of salt, which draws moisture out of the products, creating an environment that is unfavorable for bacterial growth.
Marinating: This method uses vinegar, sugar, and spices to create an acidic environment that also prevents spoilage.
Fermentation: This process involves fermenting vegetables in salted water, which gives them a distinctive taste and aroma.
Ingredients for Pickles and Marinades
Main Products: Cucumbers, tomatoes, cabbage, peppers, carrots, radishes, mushrooms, and many other vegetables and fruits.
Spices: Garlic, dill, bay leaves, black and red pepper, mustard, coriander, horseradish, and others.
Liquids: Water, vinegar (9% or 6%), vegetable oil, sugar, salt.
Sterilizing Jars
Sterilizing jars is an important step in preparing for canning, which helps prevent spoilage of the products. Here are several methods for sterilizing jars before making marinades or jams:
Oven Sterilization
Prepare the Jars: Wash the jars thoroughly with soap and hot water, then rinse them with clean water.
Preheat the Oven: Set the temperature to 120–150° C (248–302° F).
Sterilization: Place the jars upside down on a baking sheet and put them in the preheated oven. Leave them for 10–15 minutes.
Cooling: Carefully remove the jars using kitchen mitts and let them cool.
Stovetop Sterilization
Prepare the Jars: Wash the jars with soap and rinse them.
Fill the Pot: Place the jars in a large pot and fill it with water so that it covers the jars by 2/3.
Boiling: Bring the water to a boil and boil the jars for 10–15 minutes.
Cooling: Carefully remove the jars with tongs and let them cool.
Boiling Water Sterilization
Prepare the Jars: Wash the jars with soap and rinse them.
Boil Water: Bring water to a boil in a pot.
Pour Over the Jars: Place the jars in the sink or a large bowl and pour boiling water over them. Leave for 5–10 minutes.
Cooling: Carefully remove the jars and let them cool.
Microwave Sterilization
Prepare the Jars: Wash the jars with soap and rinse them.
Fill the Jars: Fill the jars with water up to 1/4 full and place them in the microwave.
Sterilization: Turn on the microwave at high power for 5–10 minutes (the time depends on your microwave’s wattage).
Cooling: Carefully remove the jars, empty the water, and let them cool.
Helpful Tips for Sterilization
Lids: Don’t forget to sterilize the lids as well. You can boil them in water for 5–10 minutes or treat them in the oven.
Handling Hot Jars: Use kitchen mitts or tongs to avoid burns.
Sterility: Work with jars and lids only with clean hands or gloves to avoid contamination.
Sterilizing jars is a simple but crucial step that will help keep your preserves in perfect condition!
Recipes for Pickles and Marinades
1. Salted Cucumbers
Ingredients:
Cucumbers — 1 kg
Water — 1 liter
Salt — 100 g
Garlic — 3–4 cloves
Dill — 1 bunch
Bay leaves — 2–3 pieces
Black peppercorns — 5–6 pieces
Directions:
Thoroughly wash the cucumbers and soak them in water for 2–3 hours.
In a pot, bring the water to a boil and dissolve the salt in it.
Pack the cucumbers into a jar, adding the chopped garlic, dill, bay leaves, and pepper.
Pour the hot brine over the cucumbers, ensuring they are completely covered.
Seal the jar with a lid and leave it at room temperature for 2–3 days, then transfer it to a cool place for 1–2 weeks.
2. Marinated Tomatoes
Ingredients:
Tomatoes — 1 kg
Water — 1 liter
Vinegar — 200 ml
Sugar — 100 g
Salt — 50 g
Garlic — 3–4 cloves
Dill — 1 bunch
Spices to taste (pepper, bay leaves)
Directions:
Thoroughly wash the tomatoes and pierce them with a knife in several places. In a pot, mix the water, vinegar, sugar, and salt, and bring to a boil.
Pack the tomatoes into sterilized jars, adding garlic, dill, and spices. Pour the hot marinade over the tomatoes, ensuring they are completely covered.
Seal the jars with lids and let them cool at room temperature. Then transfer them to the refrigerator.
3. Sauerkraut
Ingredients:
Cabbage — 1 kg
Carrot — 1 piece
Salt — 20 g
Spices (optional): bay leaves, black pepper, dill seeds.
Directions:
Shred the cabbage and grate the carrot on a coarse grater. In a deep bowl, mix the cabbage, carrot, and salt.
Knead the mixture well to release the juice. Pack the cabbage into a clean jar or pot, pressing it down tightly.
Cover the cabbage with cheesecloth or a lid and leave it at room temperature for 3–5 days.
Check daily to ensure the cabbage is covered with juice. If necessary, add a little water. After fermentation, transfer the cabbage to the refrigerator.
4. Tips for Beginners
Cleanliness: Use sterilized jars and lids to avoid spoilage of the products.
Proportions: Pay attention to the proportions of salt and sugar in the marinade, as they affect the taste and preservation.
Experiment: Don’t be afraid to experiment with different spices and additions to find your perfect flavor.
5. Interesting Facts About Pickles and Marinades
Ancient Traditions: The salting and pickling of vegetables and fruits have been practiced for thousands of years. It is one of the oldest methods of food preservation.
Health Benefits: Fermented products contain probiotics that are beneficial for digestion.
Variety: Different cultures have their unique recipes and methods of preservation, such as kimchi in Korea or tsukemono in Japan.
Pickles and marinades are not only a way to preserve food but also an opportunity to delight yourself and your loved ones with delicious snacks. Try, experiment, and enjoy the results of your labor!
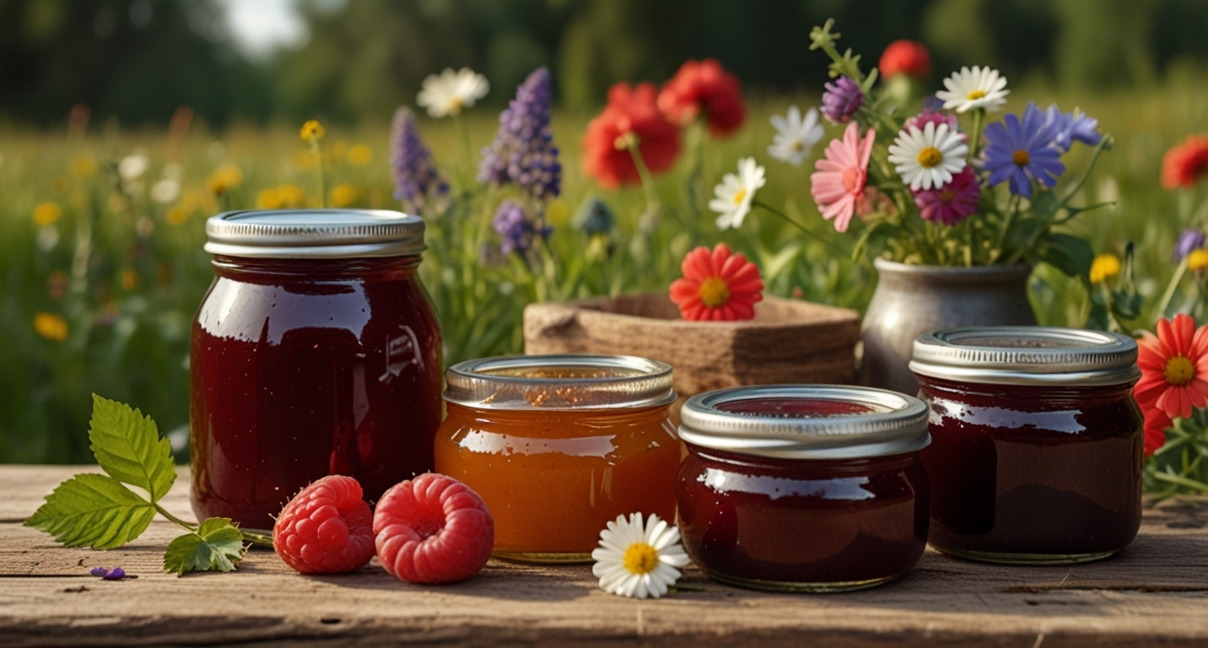
Russian Jam
Jam is one of the most popular ways to preserve fruits and berries for the winter. It not only retains the taste and aroma of fresh products but also allows you to enjoy their health benefits all year round. In this chapter, we will look at recipes for jam made from currants, apples, pumpkin, and strawberries, as well as share some useful tips for preparation.
1. Currant Jam
Ingredients:
Currants (red or black) — 1 kg
Sugar — 1.2 kg
Water — 200 ml (optional)
Directions:
Thoroughly wash the currants and remove any stems and leaves. In a pot, mix the currants with sugar. If you prefer a thinner jam, add water. Let the mixture sit for 1–2 hours to release the juice.
Place the pot over medium heat and bring to a boil, stirring. Reduce the heat and simmer for 15–20 minutes, skimming off any foam.
Check the readiness of the jam: a drop should not spread on a plate. Pour the hot jam into sterilized jars and seal with lids.
2. Apple Jam
Ingredients:
Apples — 1 kg
Sugar — 800 g
Lemon juice — 1 tablespoon
Spices (optional): cinnamon, cloves
Directions:
Peel the apples, remove the seeds, and cut them into small pieces. In a pot, mix the apples with sugar and lemon juice. Let it sit for 1–2 hours to allow the apples to release their juice.
Place the pot over medium heat and bring to a boil. Reduce the heat and simmer for 30–40 minutes, stirring occasionally.
Add spices to taste and cook for another 10–15 minutes. Check the readiness of the jam. Pour into sterilized jars and seal.
3. Pumpkin Jam
Ingredients:
Pumpkin (peeled) — 1 kg
Sugar — 800 g
Water — 300 ml
Orange or lemon zest — to taste
Directions:
Cut the pumpkin into small cubes. In a pot, mix the pumpkin, sugar, and water. Let it sit for 1–2 hours.
Place over medium heat and bring to a boil. Reduce the heat and simmer for 30–40 minutes, stirring occasionally.
Add the zest and cook for another 10–15 minutes until reaching the desired consistency. Pour the hot jam into sterilized jars and seal.
4. Strawberry Jam
Ingredients:
Strawberries — 1 kg
Sugar — 700 g
Lemon juice — 2 tablespoons
Directions:
Rinse the strawberries, remove the stems, and cut them in half or into quarters. In a pot, mix the strawberries with sugar and lemon juice. Let it sit for 1–2 hours.
Place over medium heat and bring to a boil. Reduce the heat and simmer for 15–20 minutes, stirring gently.
Check the readiness of the jam. Pour into sterilized jars and seal.
5. Helpful Tips for Making Russian Jam
Sterilization: Before filling jars with jam, be sure to sterilize them to prevent spoilage.
Checking Readiness: To check if the jam is ready, drop a small amount onto a cold plate. If the drop doesn’t spread, the jam is ready.
Storage: Store the jam in a cool, dark place. Once opened, it’s best to keep it in the refrigerator.
Jam is a fantastic way to preserve the taste of summer and autumn for the long winter months. It’s perfect for serving with tea and using in baking.
Section 2: First Courses
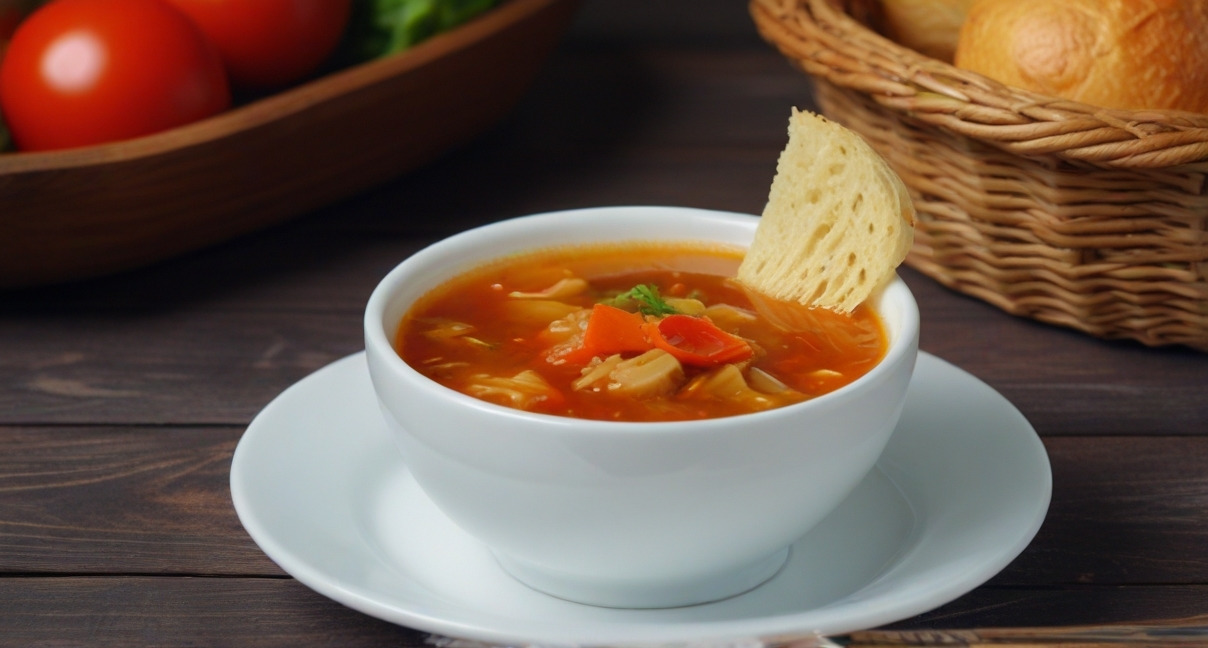
Shchi — Russian Cabbage Soup
Cabbage soup, or «shchi,» is a traditional Russian dish that combines simplicity with rich flavor. It’s the perfect first course for the cold season, warming you up and filling you with energy. Let’s make some shchi!
Ingredients:
Fresh cabbage — 400 g
Potatoes — 3–4 medium-sized
Carrot — 1
Onion — 1
Tomatoes (or tomato paste) — 2 (or 2 tablespoons of paste)
Meat (beef or pork) — 300 g (optional)
Garlic — 2–3 cloves
Dill or parsley — to taste
Salt, pepper — to taste
Bay leaf — 1–2
Water or broth — 1.5–2 liters
Vegetable oil — 2 tablespoons
Directions
Preparing the Meat (if using): If you choose to add meat, cut it into small pieces. In a heavy-bottomed pot, heat the vegetable oil and sauté the meat until golden brown. This will give the broth a rich flavor.
Sautéing the Vegetables: Add diced onion and grated carrot to the meat. Sauté over medium heat for 5–7 minutes until the onion becomes translucent.
Adding the Cabbage: Cut the cabbage into thin strips and add it to the pot. Sauté for another 5 minutes, stirring. This helps the cabbage release its flavor.
Adding the Potatoes: Peel and dice the potatoes, then add them to the pot.
Tomato Base: If using fresh tomatoes, chop them and add to the pot. If using tomato paste, add it along with the water. This will give the shchi a vibrant color and flavor.
Pouring in the Broth: Add water or meat broth (about 1.5–2 liters) to the pot. Bring to a boil, then add the bay leaf, salt, and pepper to taste.
Cooking: Reduce the heat and simmer the shchi on low for 30–40 minutes, until all the vegetables are tender.
Final Touch: Five minutes before it’s done, add finely chopped garlic and herbs. This will give the dish a fresh aroma.
Serving: Serve the shchi hot, garnished with fresh herbs. You can also add sour cream if desired.
Cooking Tips
For Rich Flavor: Sautéing the meat and vegetables before boiling helps to enhance their flavors. Don’t skip this step!
A Touch of Sourness: To add a slight tang to the shchi, you can include a bit of acidity (such as lemon juice or vinegar) about 5 minutes before it’s done.
Substituting Cabbage: If fresh cabbage is unavailable, you can use sauerkraut. However, in this case, reduce the amount of salt.
Clear Shchi: You can make shchi without tomatoes or tomato paste for a lighter color. To achieve a clearer broth, strain it through a sieve.
Interesting Facts
Historical Aspect: Shchi is one of the oldest dishes in Russian cuisine, prepared since ancient times. It was believed that shchi could be either vegetarian or meaty, depending on the season and holidays.
Health Benefits of Cabbage: Fresh cabbage is rich in vitamins and minerals, as well as fiber, making shchi not only delicious but also healthy.
Variety: Shchi can be made with various additions — mushrooms, beans, and you can also use different types of meat or even make it completely meatless.
I hope you enjoy this recipe for shchi with fresh cabbage! Bon appétit!
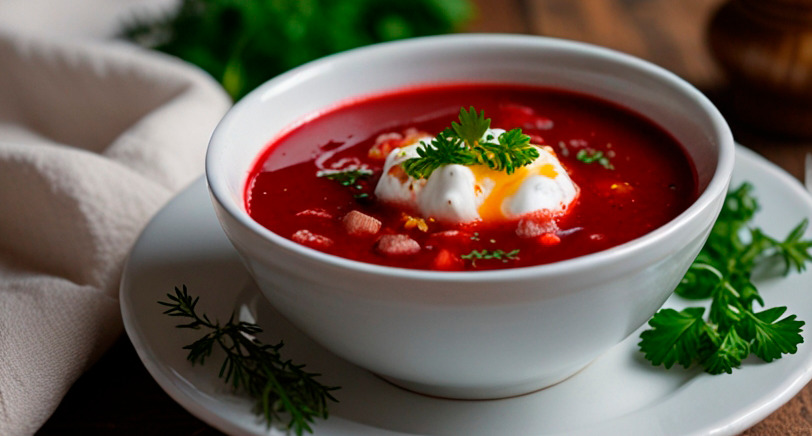
Borscht with Pampushki
Ingredients for Borscht:
Beets — 2–3 medium-sized
Potatoes — 3–4 medium-sized
Carrots — 1–2
Cabbage — 200 g (finely shredded)
Бесплатный фрагмент закончился.
Купите книгу, чтобы продолжить чтение.