
Бесплатный фрагмент - 3D drawing
Hole on asphalt

Artist Farit
3D DRAWING
Detailed course 3D drawing
Volume Three.
Hole on asphalt.
Table of contents
Introduction.
3D drawing on asphalt.
Conclusion
.
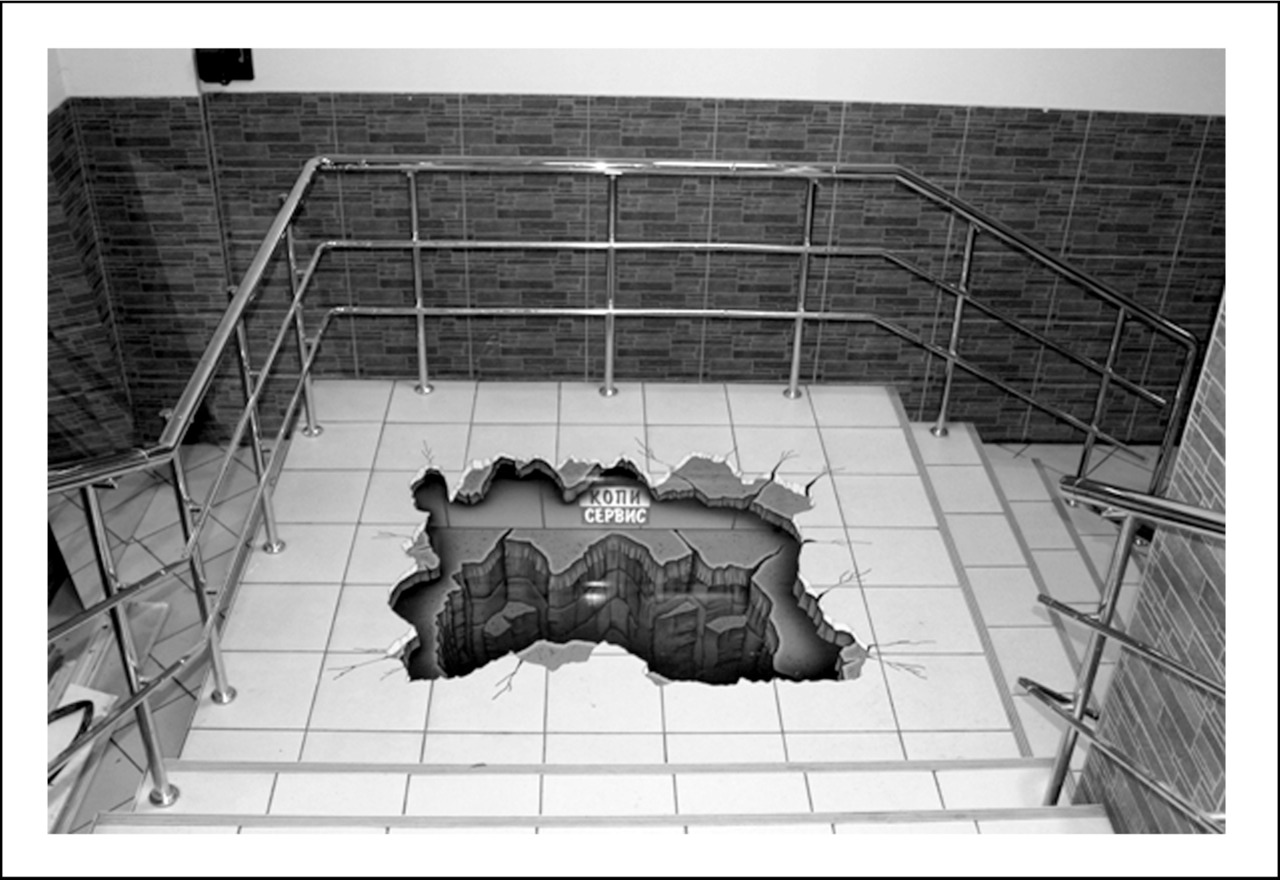
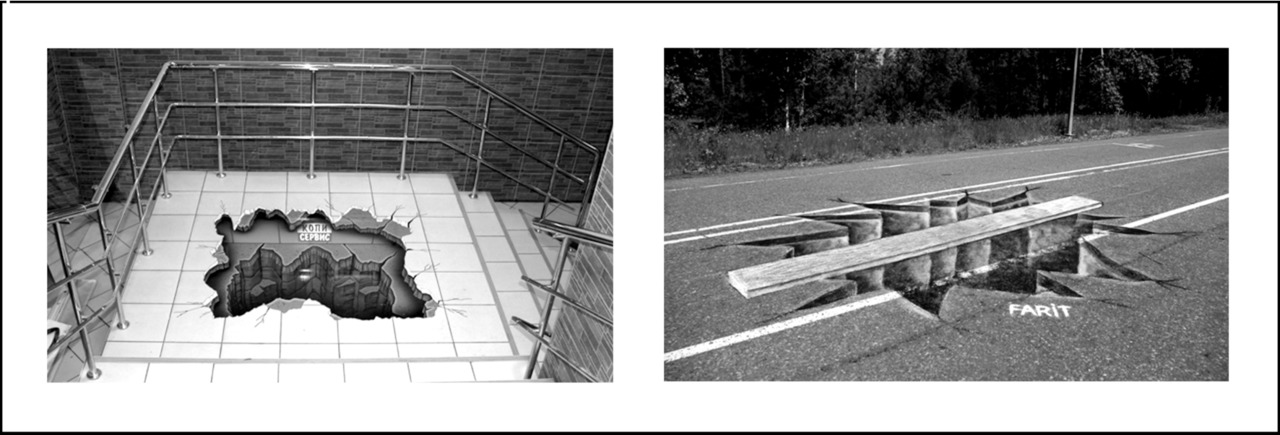
This drawing lasted only one day on the stairs of the shopping center. One woman, seeing the drawing, was frightened, but when she looked closely, she laughed. Later, one of the visitors was more seriously afraid, and complained to the director of the shopping center. The director said — Remove the drawing, I do not need heart attacks on the stairs of my shopping center.
ATTENTION!
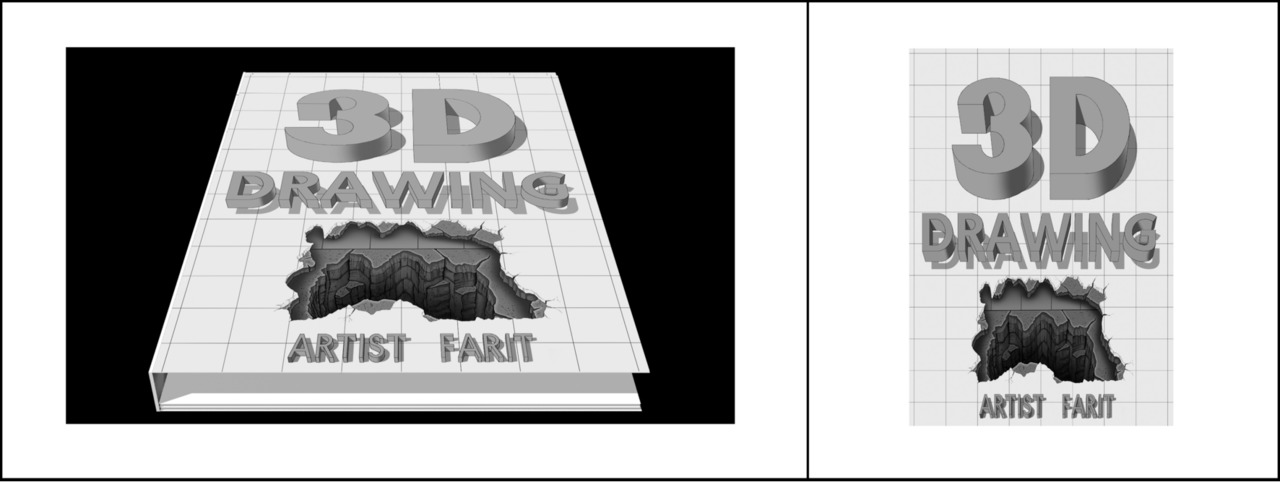
You are watching the book «3D DRAWING. Hole on asphalt.»
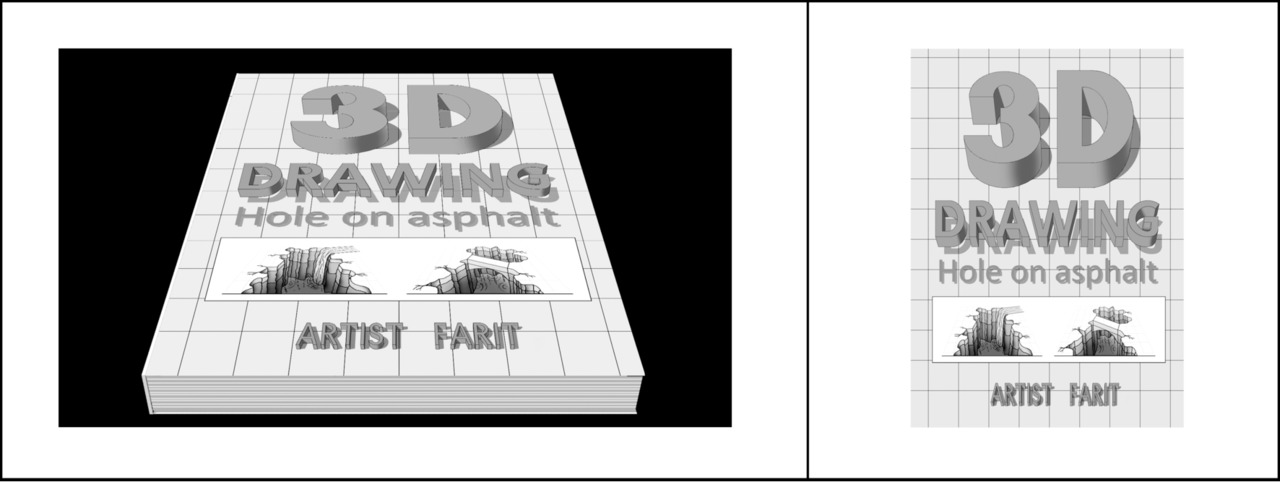
If some time ago, you bought the first version of this book, with the short title «3D DRAWING», without the addition of «Hole on asphalt», the cover of which is shown below.
In this case, buy the book «3D DRAWING. Hole on asphalt.» Which you are currently viewing is not necessary. The book «3D DRAWING. Hole on asphalt.» contains the same lessons that are in the first book with the short title «3D DRAWING».
Introduction
Keep learning. Learn more about computers, about crafts, gardening — about anything. Never leave your brain lazy. «An idle brain is the devil’s workshop.» And the name of the devil is Alzheimer.
George Carlin.
At a fairly late age, I learned to draw 3D drawings. I learned on my own, not finding instructions in books or on the Internet. I came up with a very simple and visual way to learn how to draw 3D drawings. The course teaches an understanding of how to draw a 3D drawing. Detailed explanations of the fundamentals and principles, thoughtful exercises, will help readers master the secrets of the art of 3D drawing.
The course is intended for a wide range of readers. The course will be useful to novice artists, and experienced. Errors in building the perspective of 3D drawing I have met even experienced artists. If you draw at a professional level, the book will help you deepen your perspective building skills.
The course may be of interest to teachers of geometry, drawing and drawing of secondary schools, drawing schools, colleges and higher educational institutions. 3D drawing lessons will help to make drawing, sketching and geometry lessons more interesting for teenagers, youth and students. The course will be useful for the development of spatial, geometric thinking. For a better understanding of geometry. To improve spatial vision and imagination.
My course is a good way to interest geometry, adolescents and youth. Learning to draw a 3D drawing, a good way in a fun way, explain some of the laws of geometry. An interesting intellectual occupation, which can captivate adolescents and youth.
Drawing a 3D drawing (in some cases) is much easier than painting a portrait or landscape.
3D drawing, it is more — GEOMETRY. Geometry that is not studied at school. But from this it does not cease to be geometry. Many objects can be drawn using only a ruler and a dividers. Perhaps if my course becomes quite popular, a new section will appear in school geometry — geometry 3D drawing. 3D drawing is a kind of offshoot of geometry.
The course may be of interest to parents of adolescents and children. Joint development of the ability to draw 3D drawings is a good activity for spending family time. Occupation useful for the development of the brain of children, adolescents and parents. To distract teenagers and children from computer games and gadgets.
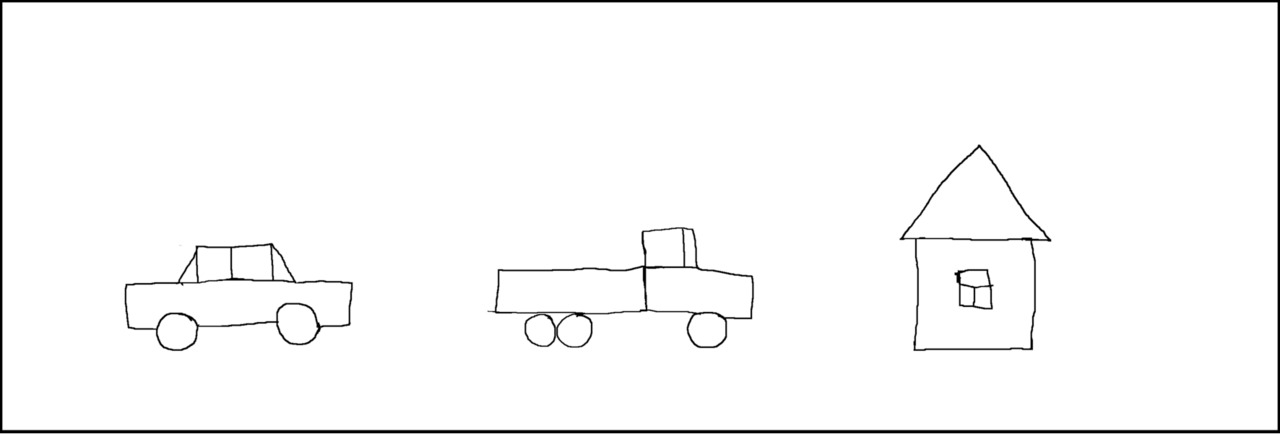
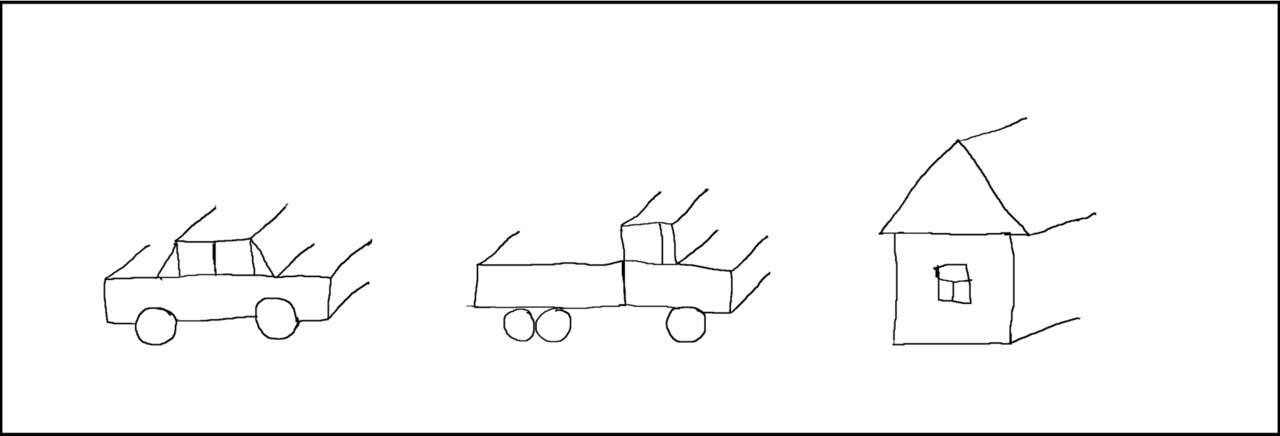
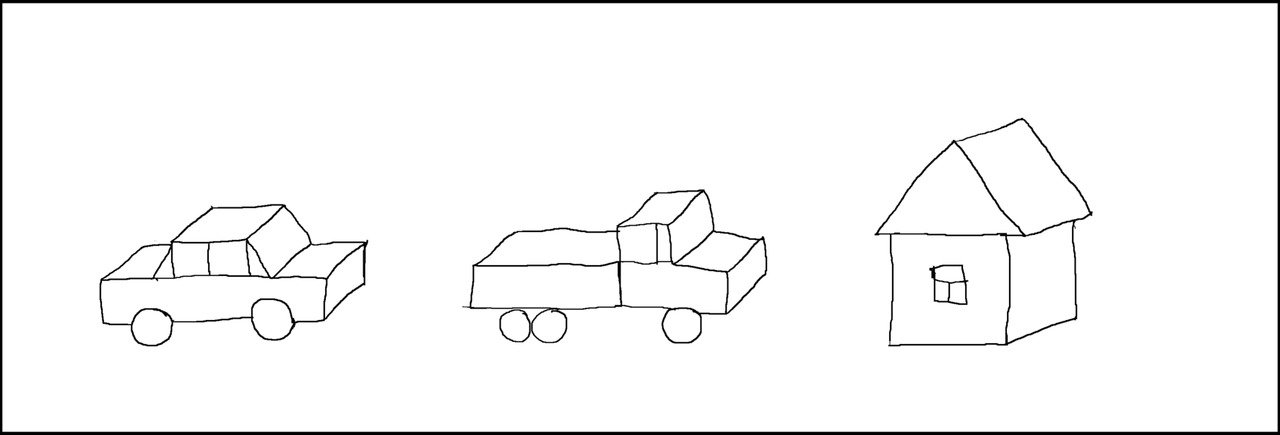
The course will be useful even to parents of 6–7 year old children. The sooner you show your child what perspective and geometry are, the better. I began to draw «voluminous» (NOT 3D) drawings in kindergarten, aged 5–6 years. Then I did not understand what geometry or perspective is. The kindergarten teacher showed me one small «trick» how to make «voluminous» drawings from my flat drawings such as «side view».
I am many years old; this lesson in kindergarten was a very long time ago. I don’t remember the details, but I well remember what effect the conversion of my «flat» drawings into «voluminous» had on me. It was like an insight. Thanks to this effect, I remember that case. Perhaps that lesson, with a little «trick», started the process of mastering and understanding geometry in my brain. After that «lesson», I drew «flat» objects and turned them into «voluminous» ones. For me it was one of the most interesting activities.
Preschoolers should watch similar lessons. If they have a predisposition to spatial vision, it will be very useful and interesting for them. Unless they are predisposed to drawing and geometry, they will not suffer from these lessons.
Perhaps if the kindergarten teacher did not show me this «trick», I would not be able, at an older age, to independently master the 3D-drawing and write this guide on the basics of 3D-graphics.
The brain in childhood is particularly tuned to learning. The first, main and main goal of the children’s brain is learning. Learning, everything that will help to survive in the race for survival, in conditions of natural selection. Therefore, children can quickly learn a second, non-native language. Learning a second language for adults is very difficult.
Surely, both the basics of perspective and the beginning of geometry, children can master in childhood better than later, as adults.
My «voluminous» drawings in childhood were not 3D drawings. 3D drawing is a bit more complicated than simple «three-dimensional» drawings. The prospect of «volumetric» drawings, in childhood, was not central, but axonometric, or parallel to oblique projection.
This type of perspective was used in drawing and painting before the central perspective was discovered and mastered during the Renaissance.
The axonometric (parallel, oblique) perspective was used in Byzantine and Old Russian painting. The Chinese and Japanese also used axonometric perspective in their paintings. Perhaps because an axonometric perspective is the easiest to understand perspective.
If young children themselves cannot master the prospect, they will be able to be proud (and show off) of their parents who can draw 3D drawings. There is such a good saying — «Do not raise a child, he will still become like you, educate yourself.» Therefore, advice to parents of young children — Learn to draw! Children looking at you will also learn.
3D drawing is not only an interesting and developing activity for free time (hobby), but also an interesting work. Being able to draw 3D drawings, you can draw advertising (commercial) or entertaining 3D drawings. Having spent several dollars on the book, you can earn ten or one hundred times more. A small 3D drawing of medium complexity can cost from 250—500 dollars/euro. Complex and large 3D drawings can cost a lot more.
Thanks to the ability to draw simple 3D drawings, I went to the international street art festival for the cost of just one 3D drawing. Moreover, I traveled abroad of my country, to a fairly large distance. 3000 km one way. Part of the road (2 hours) flew by plane, traveled by train for two nights, and this is only one way. At night I rode on the train, and during the day I walked around the cities, around Moscow, around Riga, along Bremen.
In addition, the organizers of some festivals compensate for the cost of the road, provide accommodation, partially provide food and woter, and give out some materials.
Being able to draw a 3D drawing, you can increase the number of views and the number of subscribers to your YouTube channel, or social networks. Many videos with 3D drawing, gaining thousands of views. Some videos with 3D drawing, gaining millions of views.
Drawing 3D, like any intellectual action, very good training and «gymnastics» for the brain. A diversified brain in any direction works more efficiently. Learning to draw 3D drawings, you will train your brain, and the brain will last you longer. Your brain will remain clarity and health longer.
By drawing 3D drawings, you will postpone the meeting of your Alzheimer, Parkinson and other older satellites for several years.
Drawing a 3D picture on the pavement is also good physical education. Drawing a 3D drawing on the pavement, you have to squat a lot. After drawing my first 3D drawings, my leg muscles were very sore. With a noticeable effort, I sat down and got up from my chair. But constantly drawing, «training», squatting, the leg muscles got used to the loads and stopped hurting.
Pit, hole, ground dips, hole in the floor
Square/rectangular pit, round pit, shapeless pit. A pit in the form of letters, numbers, hearts or in the form of any other forms and symbols.
Just in case, remember the rules of 3D drawing.
Rules for drawing a 3D drawing
The process of drawing a 3D drawing has several rules. We will get to know them as they are mastered and applied.
Rule number 1.
All faces, sides lying on paper, on asphalt, are drawn absolutely without distortion. If we draw a square hole, then on paper (asphalt) we draw a square. If we draw a round hole, then on paper (asphalt) we draw the correct circle. If we draw a hole in the form of a letter, number or any other symbol, we draw the contours of this object without distortion.
Rule number 2.
All «vertical», «parallel», «perpendicular» to paper (to asphalt) planes of the line of objects drawn in 3D drawing converge at one point. This point is called the «vanishing point.» The vanishing point lies on the plane in which the drawing is drawn. If the drawing is on paper, the vanishing point lies on the tablet (table) on which the sheet of paper lies. If the 3D drawing is on asphalt, the vanishing point lies on the asphalt.
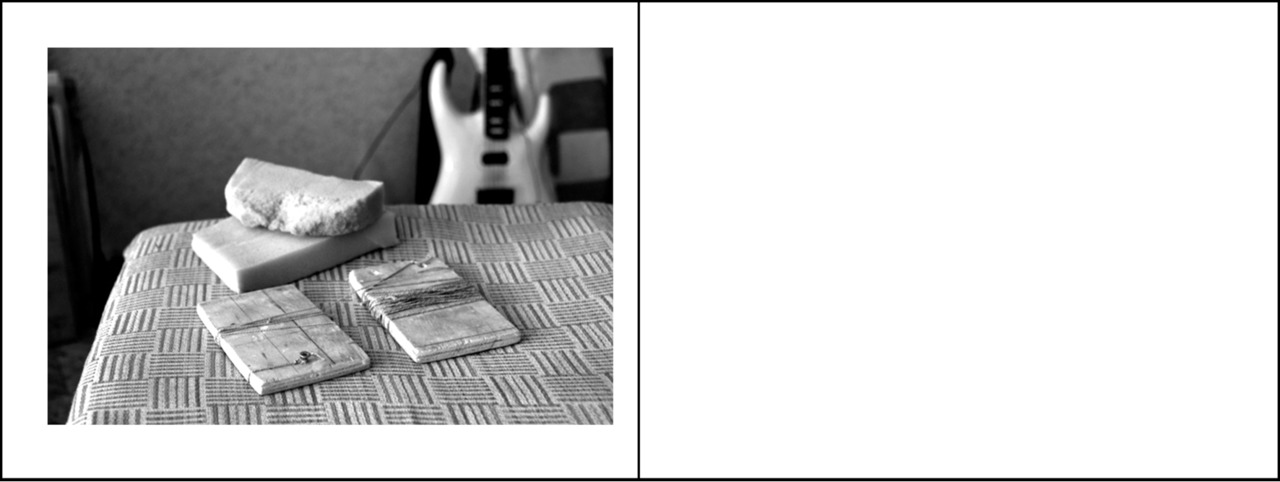
The easiest way to follow rule No. 2 when drawing on asphalt is to screw a screw into a piece of plywood, tie a cord to the screw, and lay the plywood at the vanishing point. The screw should be in the very center of the vanishing point.
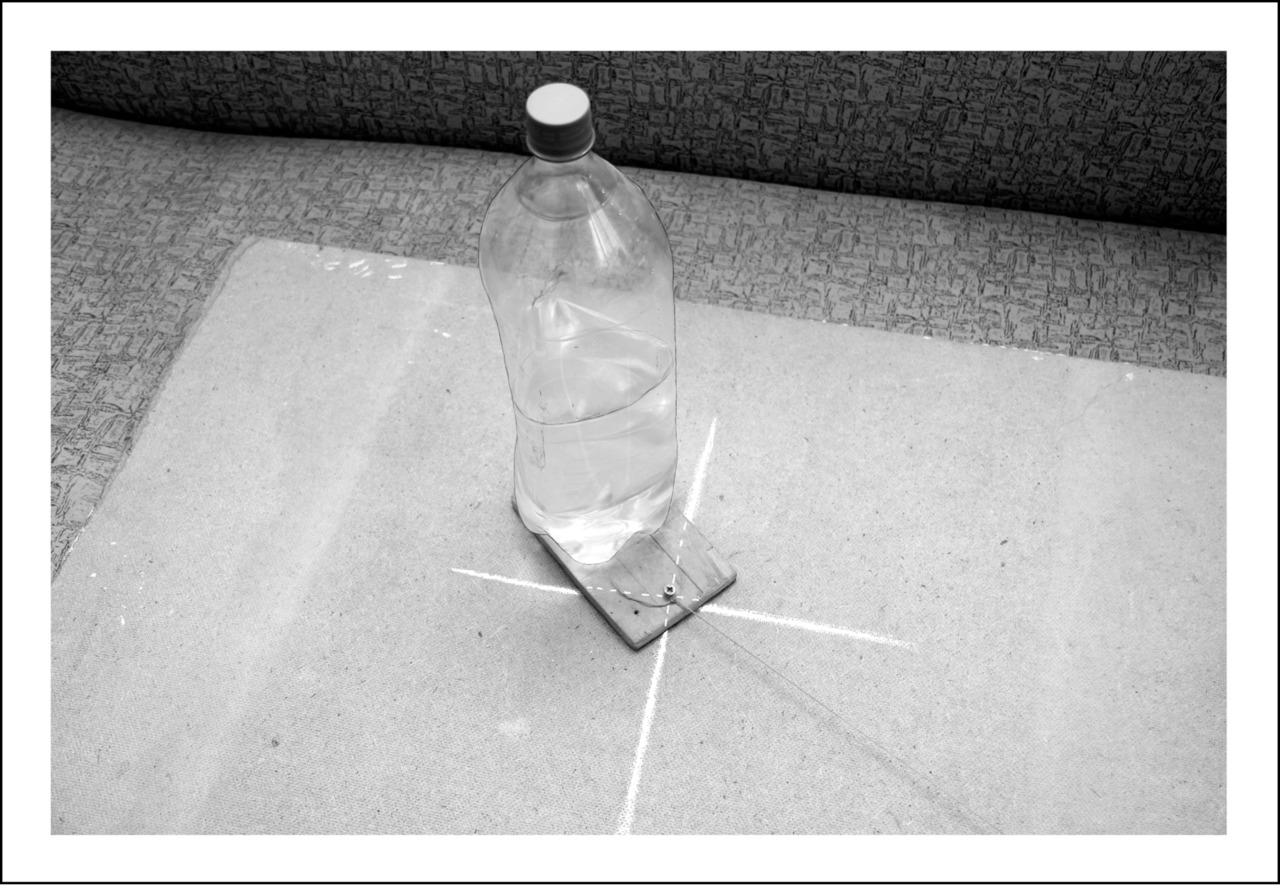
We put a bottle of water on this piece of plywood so that it does not move from this place. If there is any heavy object nearby (brick, stone), then you can put brick or stone on the plywood.
Going to the place of drawing, you can choose a suitable stone or brick, if they meet on the road. Water in the bottle is consumed, the bottle becomes lighter, and the stone does not change its weight. If you draw a lot of drawings on this site, you can hide the found stone somewhere nearby. To use it next time.
3D drawing on the pavement
Features 3D drawing on the pavement
Drawing a 3D drawing on asphalt is distinguished by tools, materials, and the fact that a 3D drawing on asphalt can be made interactive. With a 3D pattern on the pavement, people can be photographed. Another difference of the 3D pattern on the asphalt is its size. The dimensions of the 3D drawing on the pavement are much larger than the distance between the eyes of a person, and therefore the 3D effect can be seen live, and not just in the photograph. The effect of the 3D pattern is especially good when drawing holes, soil dips, wells and other holes on the surface. Therefore, 3D drawings of pits and dips are so popular.
Materials and tools for drawing on the pavement
1. Chalk white «school». White chalk is needed for preliminary marking. For drawing white objects and white parts of the picture. White chalk needs a lot. The rougher the surface, the more chalk will be consumed. White chalk is better to buy, and take with you with a large margin.
2. Barbecue charcoal. Coal is needed for drawing shadows, black objects and black parts of the picture. Coal also needs a lot, because it is quickly consumed. You can use art charcoal, but it is much more expensive, and the result on the pavement is almost the same.
3. A long ruler of thin cord.
Plywood pieces can be of different sizes. The piece into which the screw is screwed may be larger. A large size is needed so that you can put a large stone on it, or put one and a half — two-liter bottle of water.
The cord is also used as a dividers.
With the finger of one hand, hold one end of the cord in the center of the future circle. With the fingers of the other hand we hold the chalk pressed to the other end of the cord. With chalk, pressed to the cord at the right distance, draw a circle. The radius of the circle will be equal to the length of the cord.
If desired, you can make a separate tool, a rope dividers with one piece of plywood, on which there will be a screw. This screw must be placed in the center of the future circle and the second end of the cord, holding the chalk at the right distance, draw a circle.
Small circles can be drawn by tracing round objects brought with them. To draw small circles, you can trace the bottom of a plastic bucket of water. To draw circles of a slightly larger diameter, you can bring along and outline the disposable plates. For circles of larger diameter, you can circle the lid of a large (10 liter) plastic bucket, etc. If you need to draw several identical circles, for example, several vertical cylinders (columns) of a certain diameter, you can make a circle-template of the desired diameter from cardboard at home.
4. Tape measure 5-7-10 meters. Roulette is needed to measure the width, if you draw on the diagram. For marking and drawing a coordinate grid, when drawing complex non-geometric drawings on a coordinate grid. Roulette is needed to draw not very long straight lines. Roulette is needed to draw parallel lines if they are far apart.
5. A small bucket of approximately 1—2 liters. A bucket is needed for water. Soak foam pieces in water. Wet foam rubber is better washed off erroneous, preliminary, etc. unnecessary lines. Wash brushes when painting with water-based paints. A bucket can come in handy as a template for drawing small circles.
6. A bottle of water 1.5—2 liters. Water is needed in order to soak foam rubber and wash marking, auxiliary and erroneous lines, and as a load for a piece of plywood with a screw. Also in the form of a tripod load. For drinking in hot weather. For washing hands from chalk, coal, dust and dirt. Dilute water-based paints.
7. Pieces of foam rubber, preferably dense, from car seats. Pieces of foam rubber are needed to erase the preliminary, marking and erroneous lines. You need to wash the lines with foam rubber soaked in water. Foam rubber is also needed in order shade chalk, coal or pastel. Shade the chalk, charcoal and pastel, you need a dry piece of foam rubber. Therefore, pieces of foam rubber should be at least two. One will be wet, the second will be dry. Better yet, have a few pieces of foam rubber. Feather different colors better with separate pieces of foam rubber, so as not to mix, not to contaminate the colors. This is especially true for coal.
8. A square or rectangular sheet of thick paper or cardboard. A rectangular sheet of thick paper or cardboard is needed to draw right angles, angles of 45 degrees, and parallel lines. An angle of 45 degrees can be obtained by folding a right angle in half. Thick paper is better than stiff cardboard. Thick paper can be folded in half and four to put in a bag. I have a sheet of paper measuring 0.5 by 0.75 meters. Standard Whatman. I fold it first up to 0.5 by 0.5 meters, then up to 25 cm by 25 cm.
If parallel lines are 25, 50, 75 cm or more apart, then you can draw them using a sheet of cardboard, like a ruler when drawing parallel lines on paper. We attach a sheet of paper to the desired line, draw a barely noticeable parallel line on the opposite side of the sheet. Then we attach a sheet of paper to this new line, and draw a new parallel line on the opposite side. And so to the right distance.
If the line is long and you need to draw a line parallel to it far from it, then you can use tape measure. Using a tape measure, measure the desired distance from one end of the line, then measure the same distance from the other end of the line. We pull the cord between these marks, and draw a long straight line parallel to the first along the cord.
Having mastered the basics, you can begin to draw color drawings. For this you will need.
9. Chalk color.
Virtues.
The cheapest material for drawing 3D color drawings. The chalk is washed off well with water (rain and sprinklers) and therefore, for drawing with chalk, you do not need to get special permission from local authorities. Colored chalk is a good material for educational drawings.
Disadvantages.
The chalk has few colors. I found six-color chalk sets. Perhaps there are sets of colored chalk with a lot of colors.
10. Pastel. Pastel is more diverse in color. Pastel makes the picture more saturated color, and more contrast. But, Pastel is much more expensive than chalk. The pastel is also easily washed off with water. Therefore, it does not require special permission from the authorities for drawing.
11. Paints and solvents. The paint gives a richer color and a more contrasting picture. Most artists (at festivals) use gouache because gouache is easily washed off with water. If there is permission from the authorities, or the customer of the 3D drawing is the owner of a private territory, and he needs a drawing that is not washed off by water, then it can be painted with paints that are more resistant to water (rain).
ATTENTION! It is forbidden to paint with waterproof paint in public places, without special permission of local authorities, it is considered vandalism, and is prosecuted by law. Before you start painting with waterproof paints, it is better to clarify these areas of legislation in your locality and your country.
12. Brushes, and utensils for working with paints and solvents.
13. Whisk, broom or brush. To clean asphalt from small debris, sand, dust, leaves, blades of grass, etc.
14. Clothing. There should be a hat on the head. Clothing should be with long sleeves. Drawing a 3D drawing on asphalt can take one to two or more days.
ATTENTION! If you are under the sun all day without a hat, you can get a sunstroke. If you paint on a sunny day, in a shirt with short sleeves, your hands can get a sunburn. The sunburn of hands is checked on itself. I did not check sunstroke, and I do not advise you.
15. A camera, and preferably a tripod. Tripod preferably with a hook for securing cargo. Sometimes there is a strong wind, the tripod may fall and damage the camera. To prevent this from happening, I hang a bottle of water or a bag of tools and materials from the tripod hook.
16. A bag of sufficient volume to carry all of the above to the place of drawing.
Selection and preparation of the place for drawing
1. Find a suitable place.
The site is desirable, preferably without passing. Even rare cars driving through the picture will spoil it.
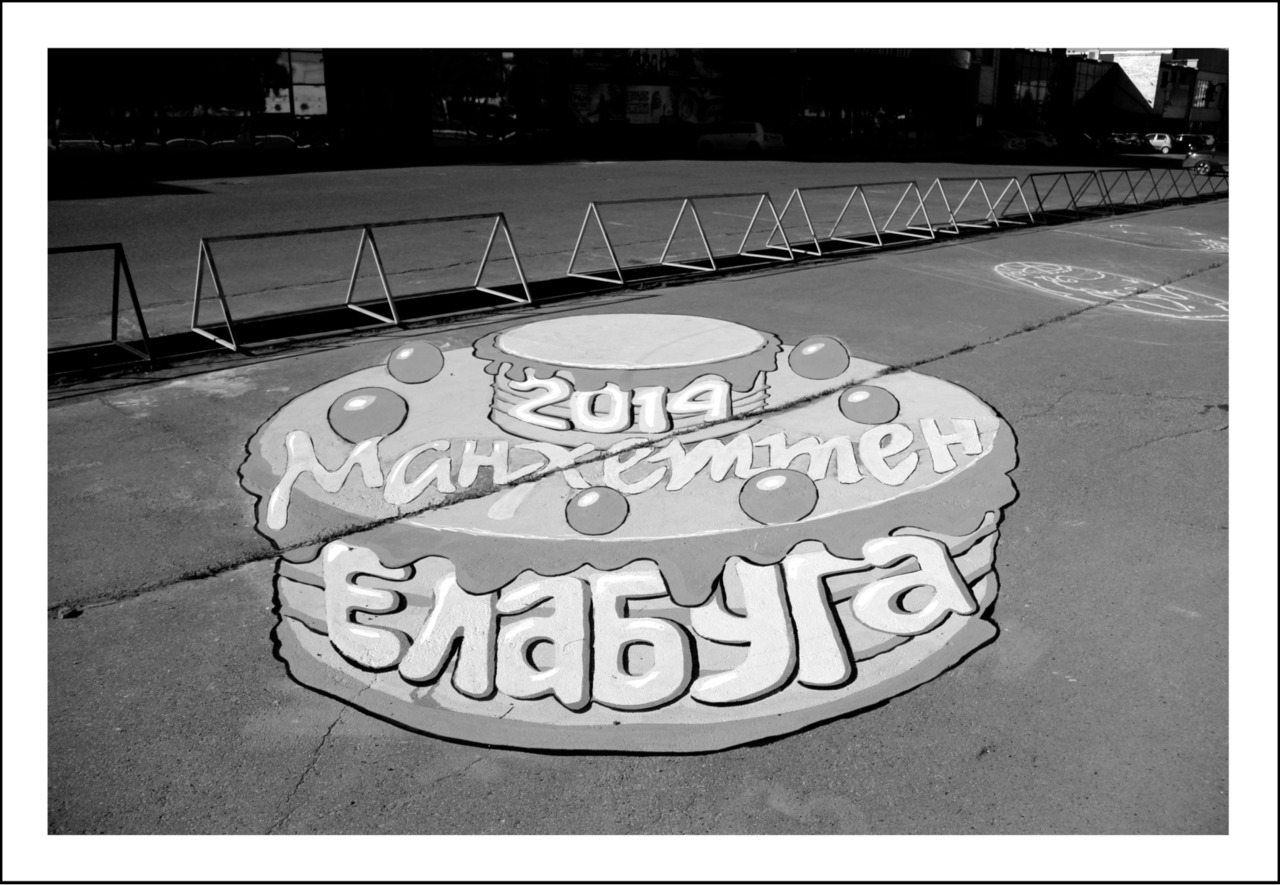
Asphalt or concrete site. The fewer cracks in the site, the joints between plates or stones, the better. Seams between plates or stones, spoil the 3D effect of the picture. Go back a couple of pages, look at the drawing of the cake. The seam passing through the entire cake greatly spoils the effect of the pattern.
Paving stones or paving slabs. If you want to draw with chalk or pastel on the cobblestones, check if chalk, charcoal and pastel are held on this surface. On some «glossy» types of paving stones, chalk, charcoal and pastel do not hold, they are blown away by a light wind.
Бесплатный фрагмент закончился.
Купите книгу, чтобы продолжить чтение.